
You want to add a developer to the account so that they can upload apps. If you have a company account, everything works out of the box.
But if you have an individual account, a third-party developer will be able to upload applications only with a special profile.
Сертификаты можно сделать вручную или через API. В этой статье разберем ручной способ.
Step by step what we are going to do:
- First, request a signature for the certificate
- Create the certificate
- Combine this certificate with the key
- Register the app (you may already have it registered).
- Create a profile based on the certificate — it is the one we need to upload app
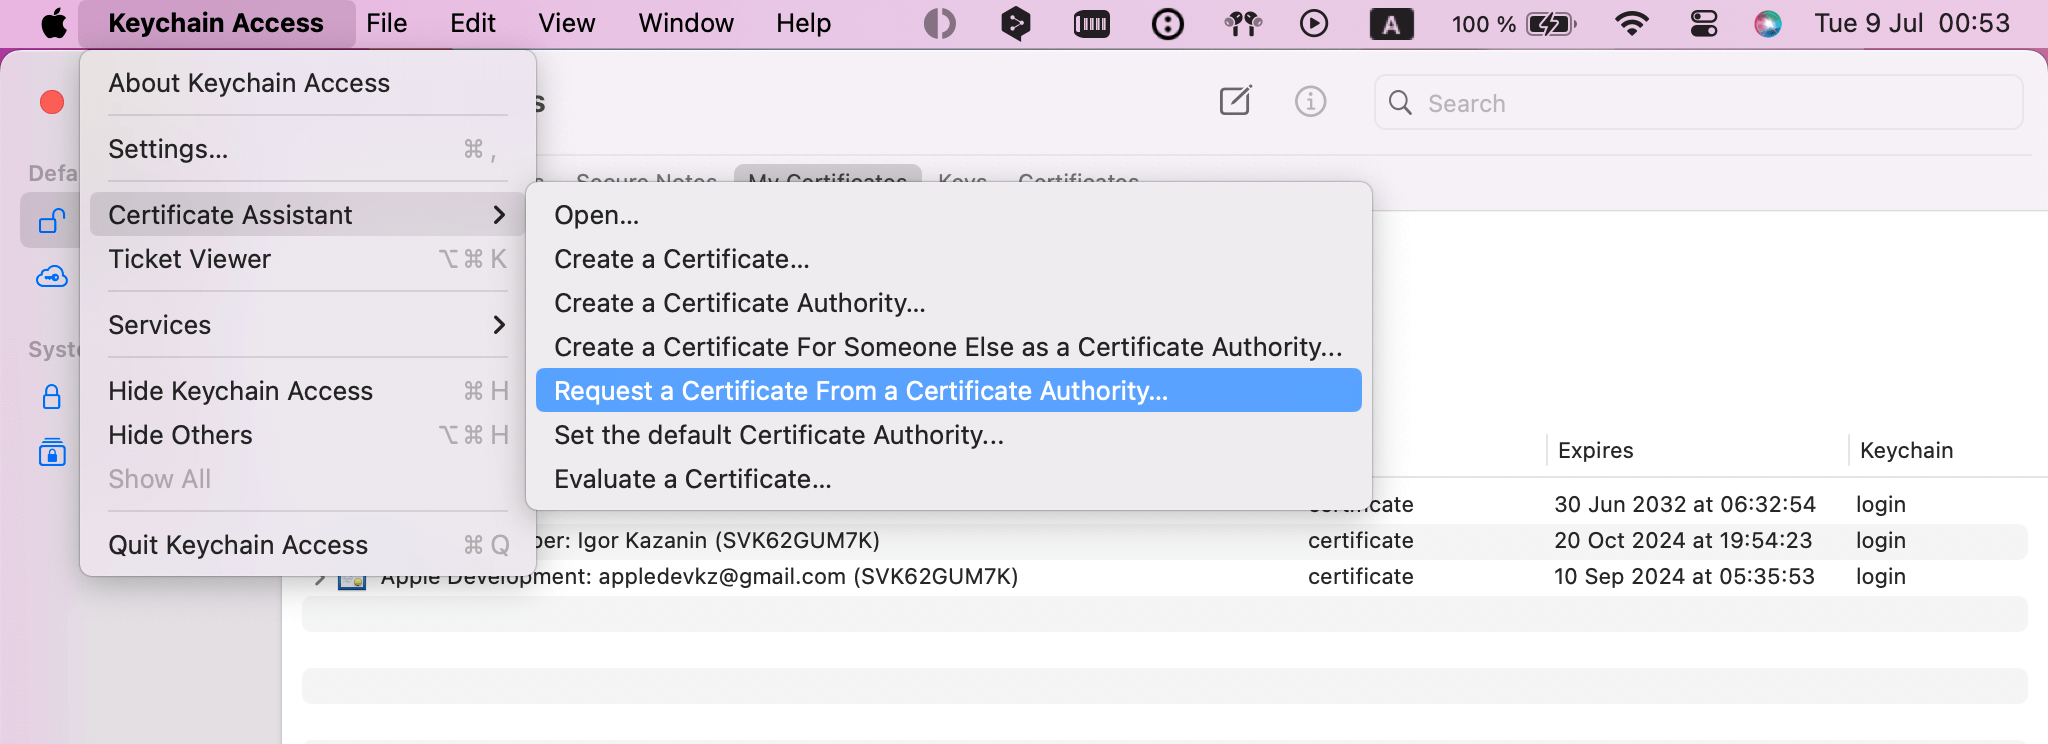
Certificate Request
We make a special request for a certificate — this is a file with the extension .certSigningRequest.
Open Keychain Access and create the file CertificateSigningRequest.certSigningRequest:
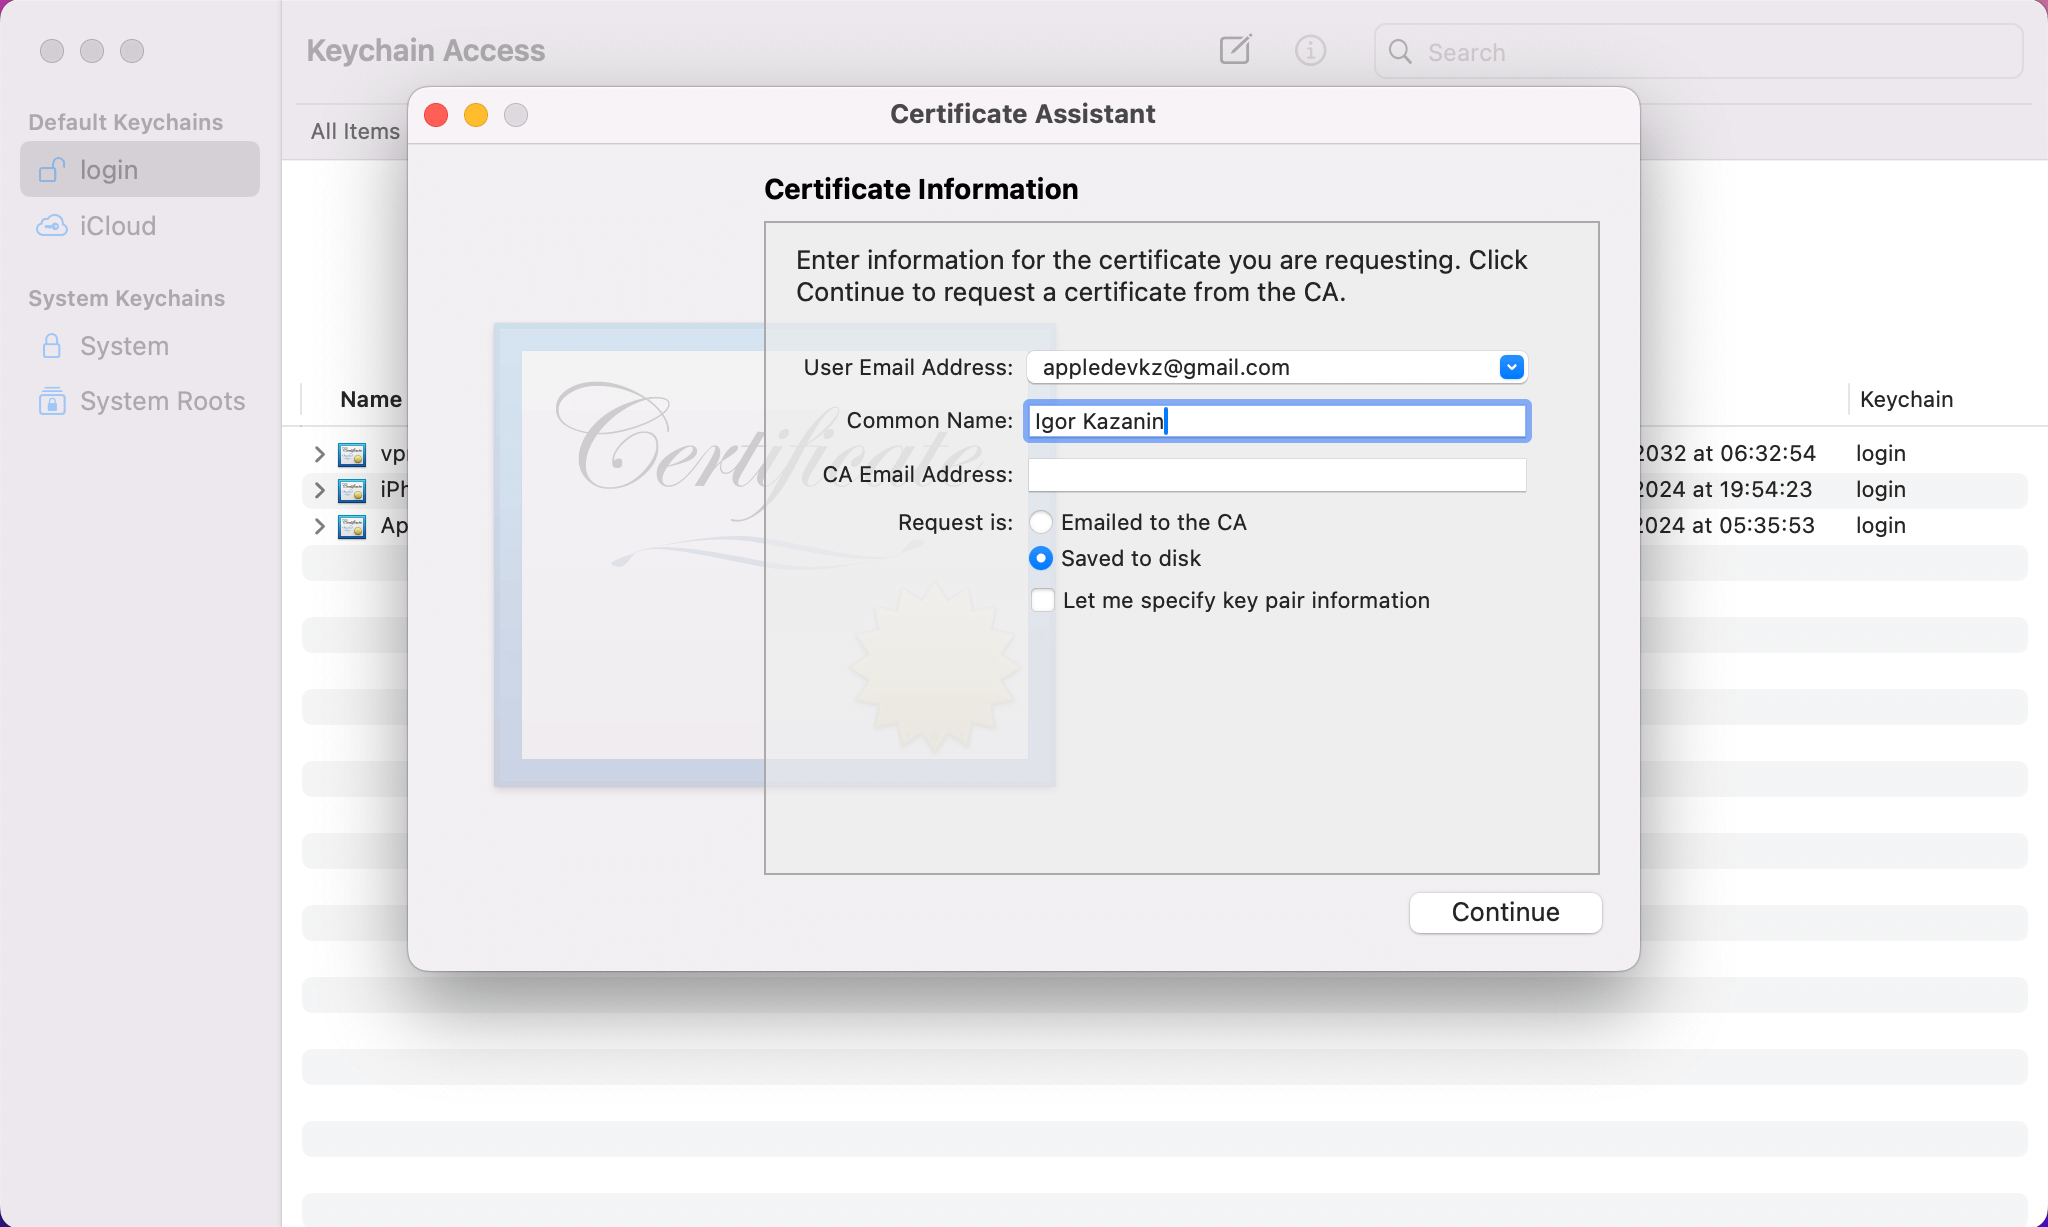
Enter your email, name and select Saved to disk. In the next window, just save the file:
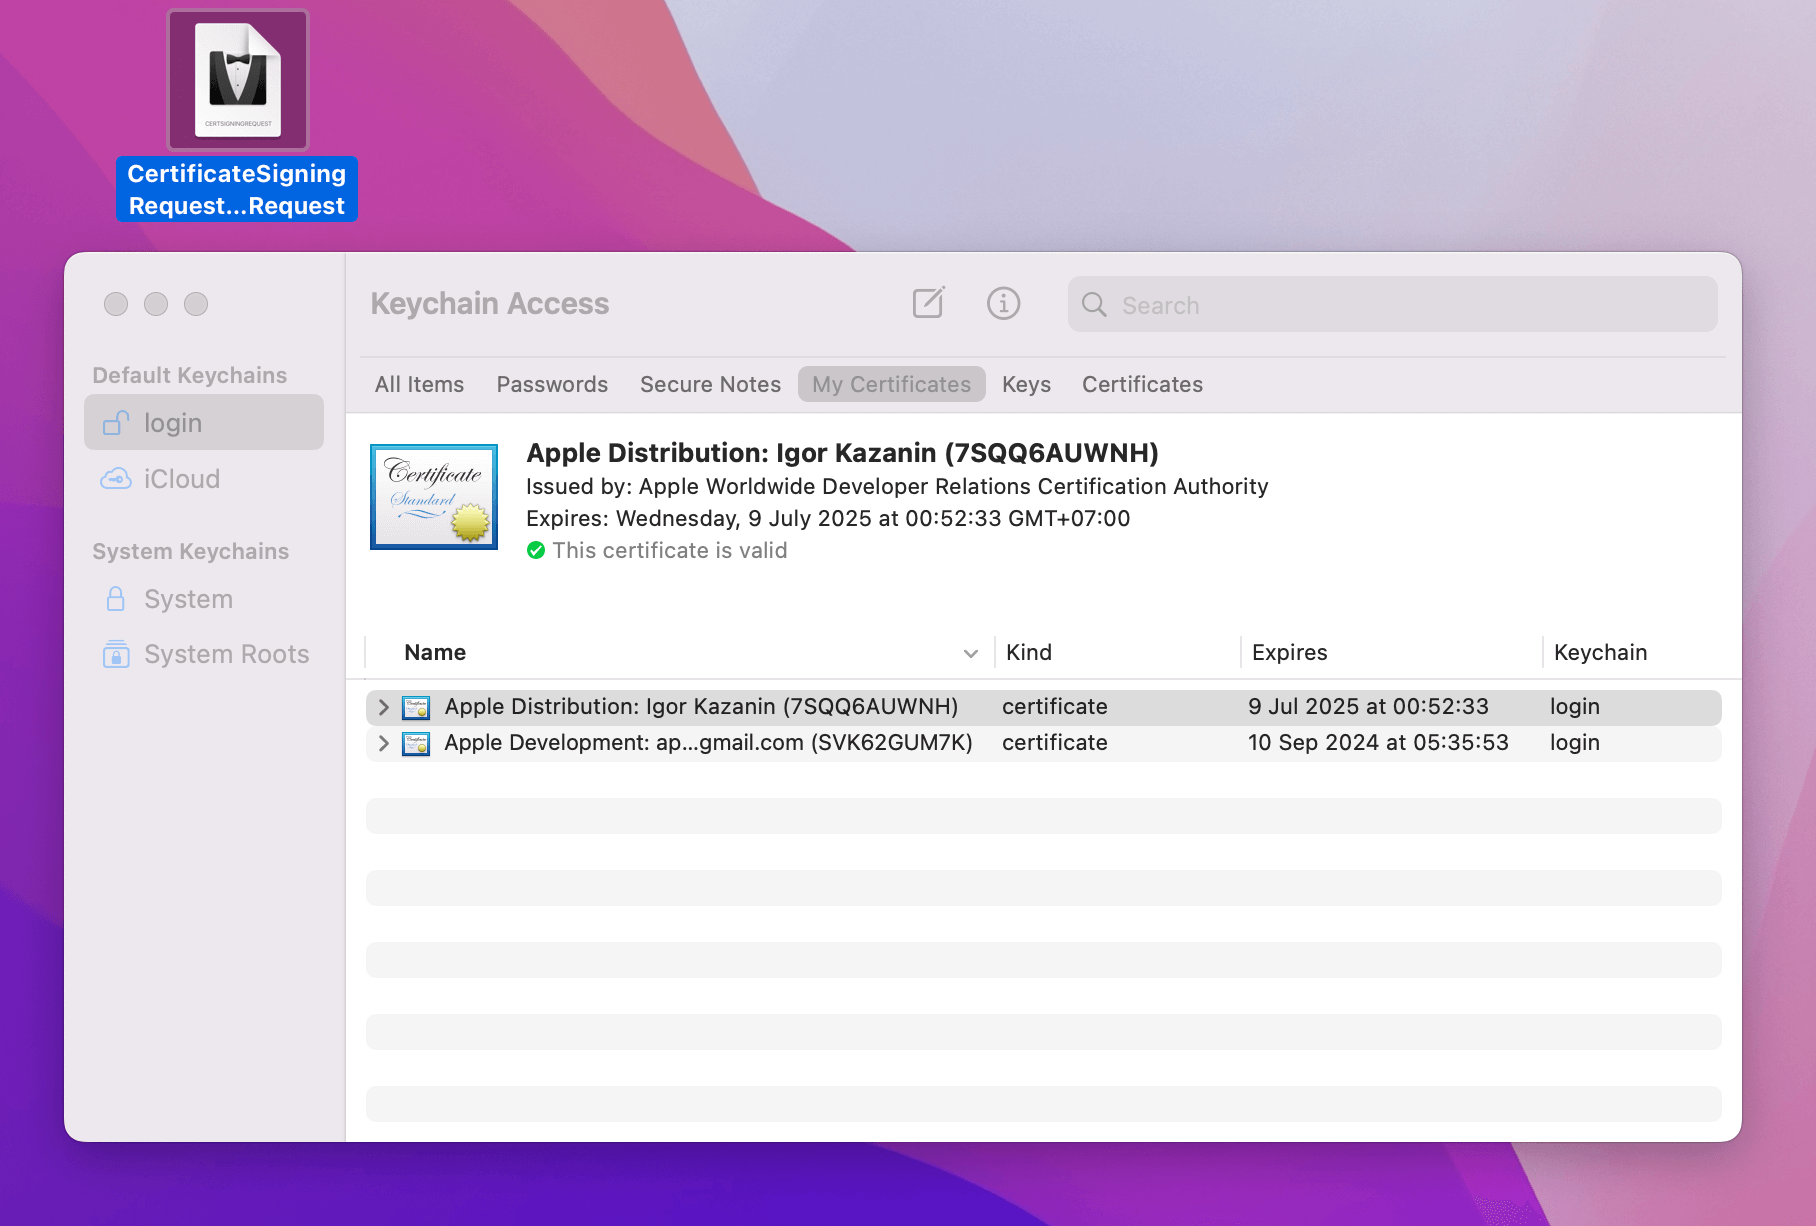
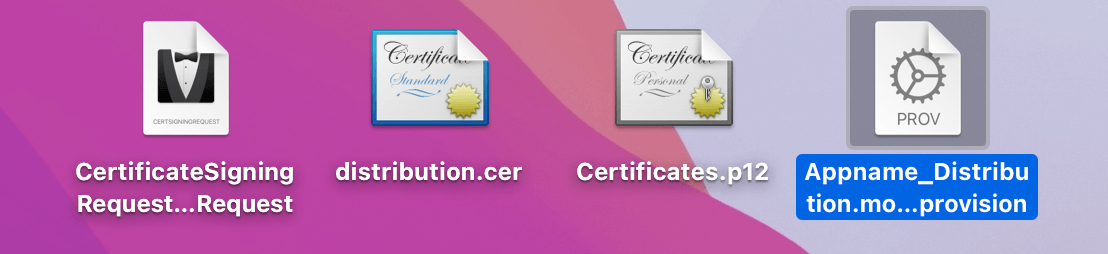
You'll have a file, it'll still come in handy:
Making a Certificate
The certificate confirms that the app is yours. The extension of the certificate file is .cer.
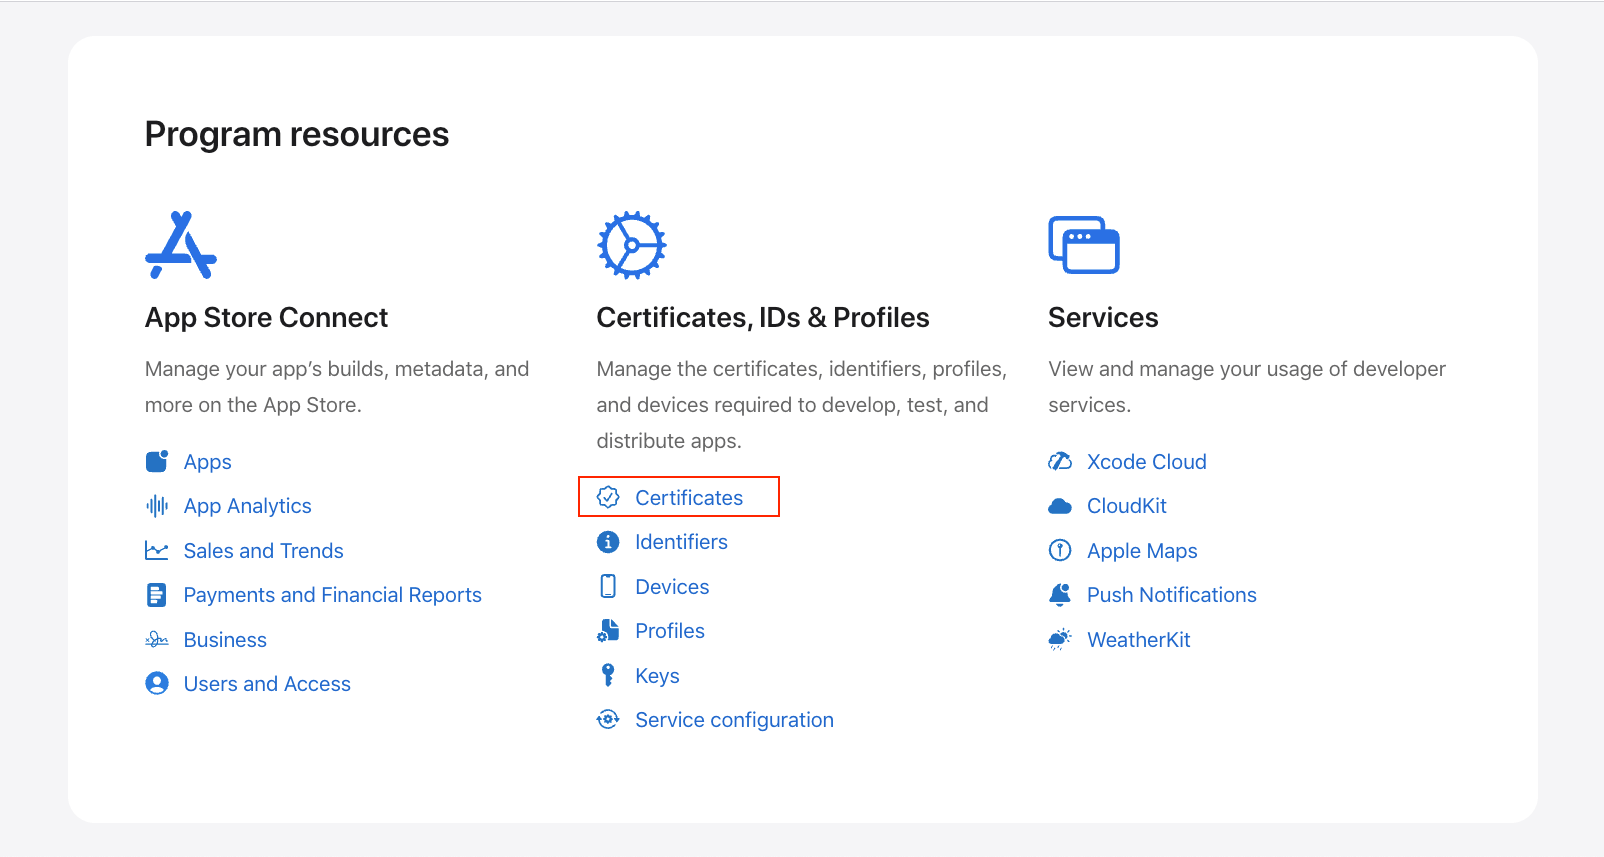
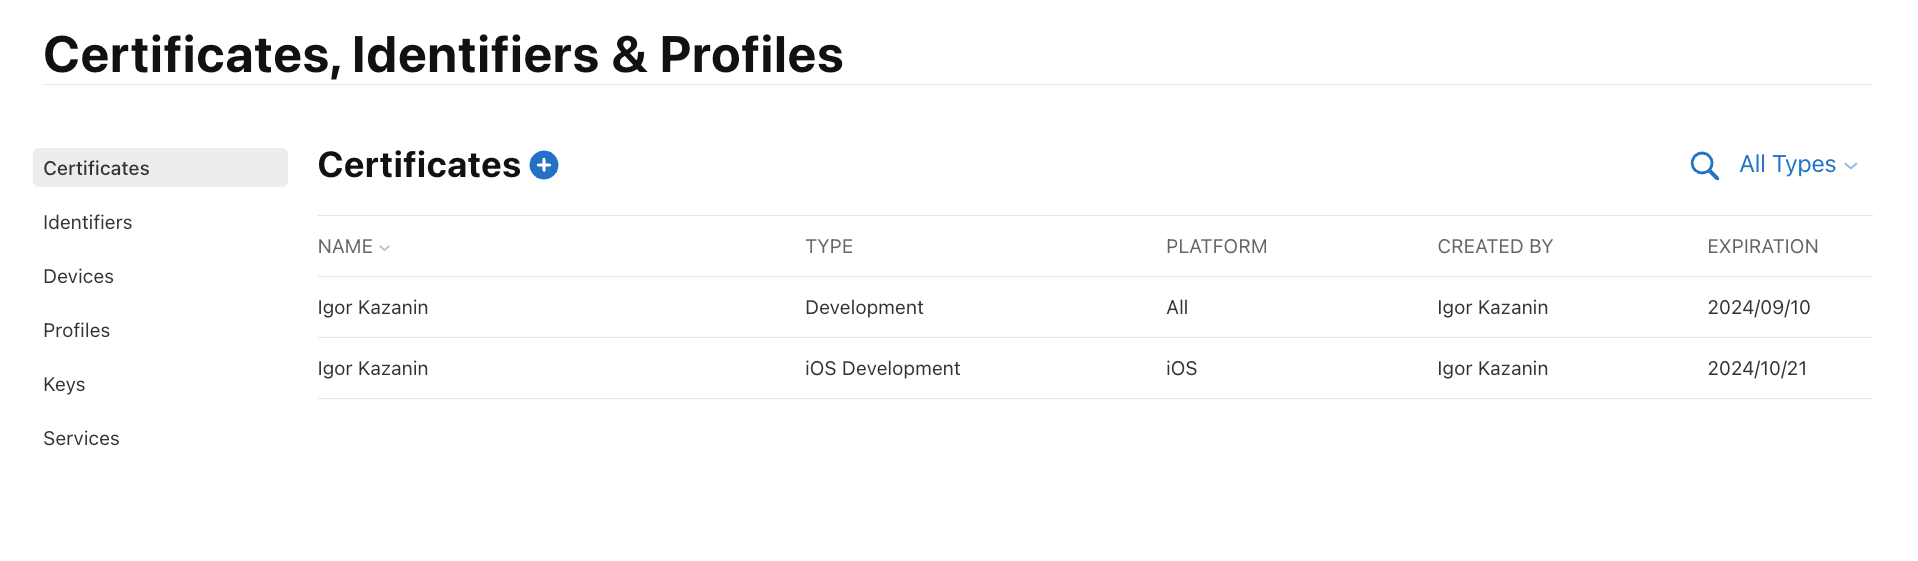
Open the Certificates tab in Developer Account:
To make a new certificate, click the plus sign:
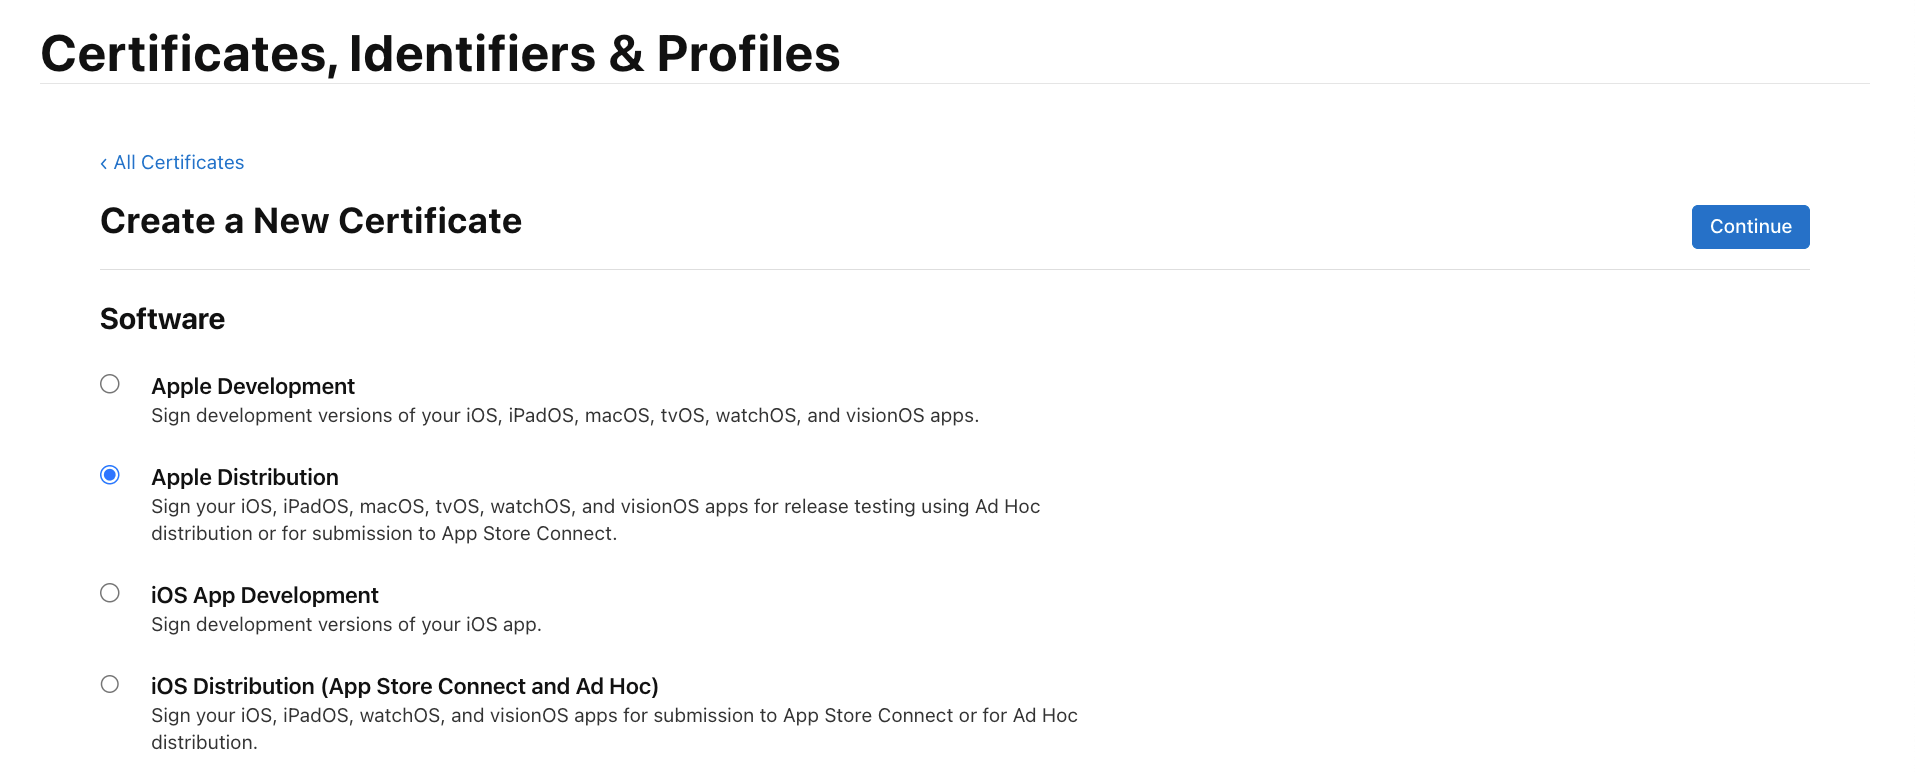
Select Apple Distribution and click Continue:
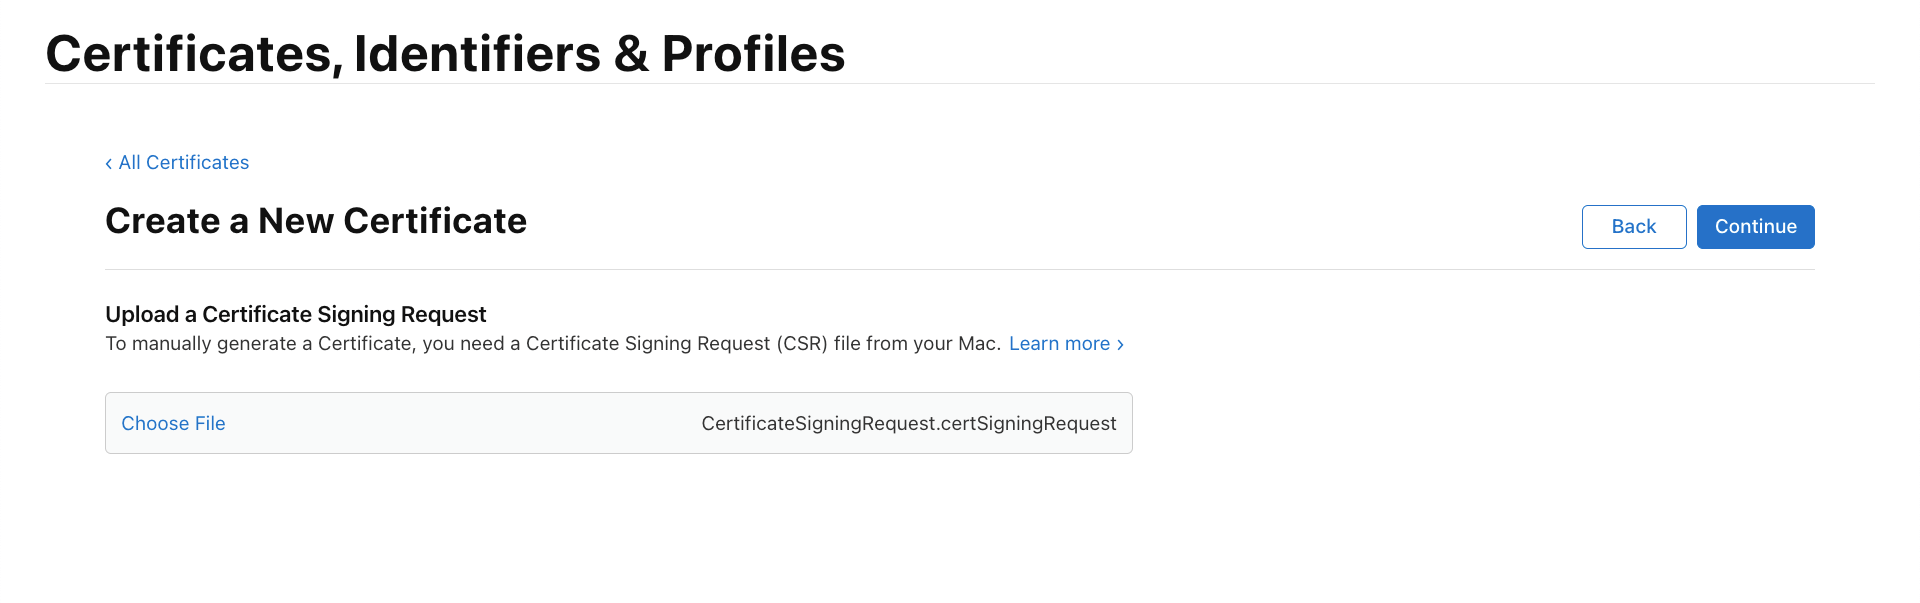
This page will ask for the .certSigningRequest certificate request file we made above. Select the file:
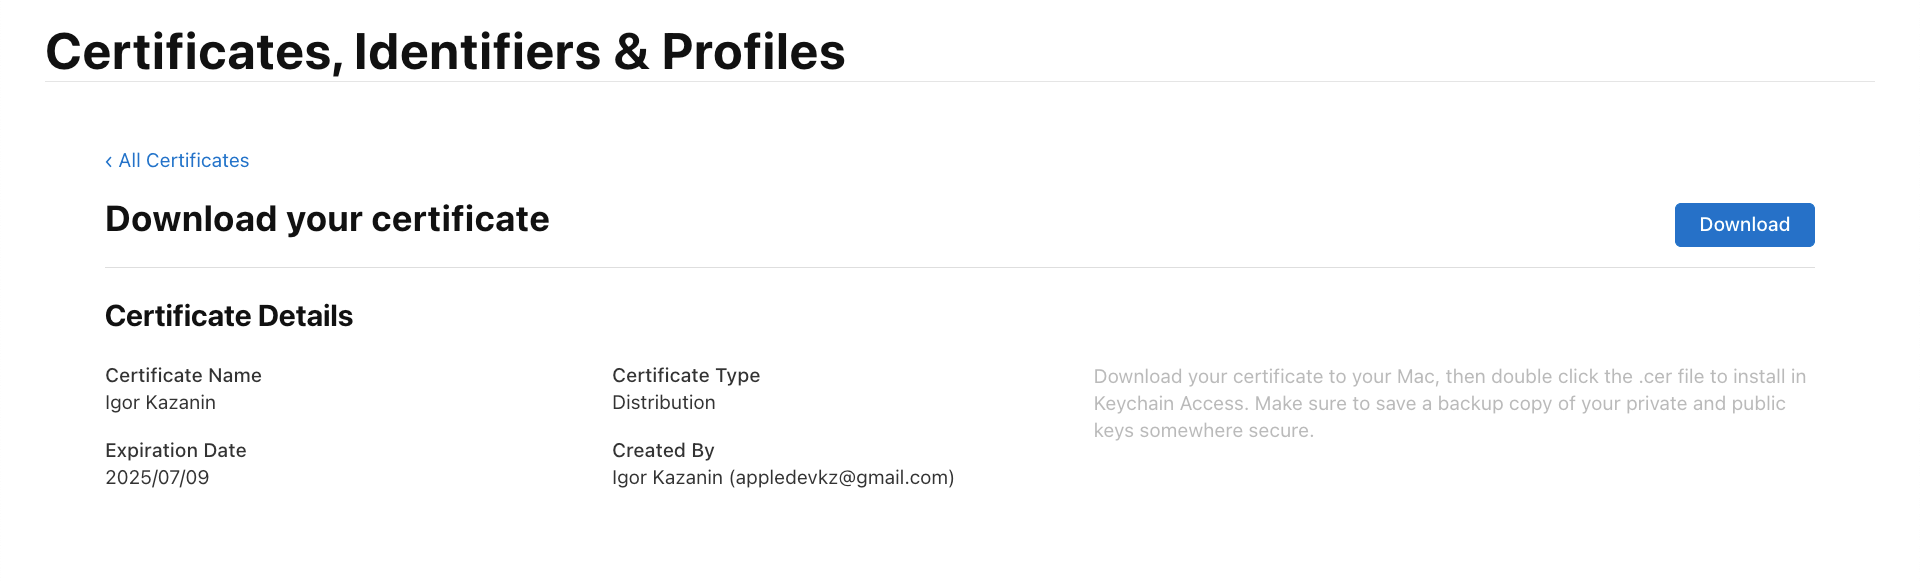
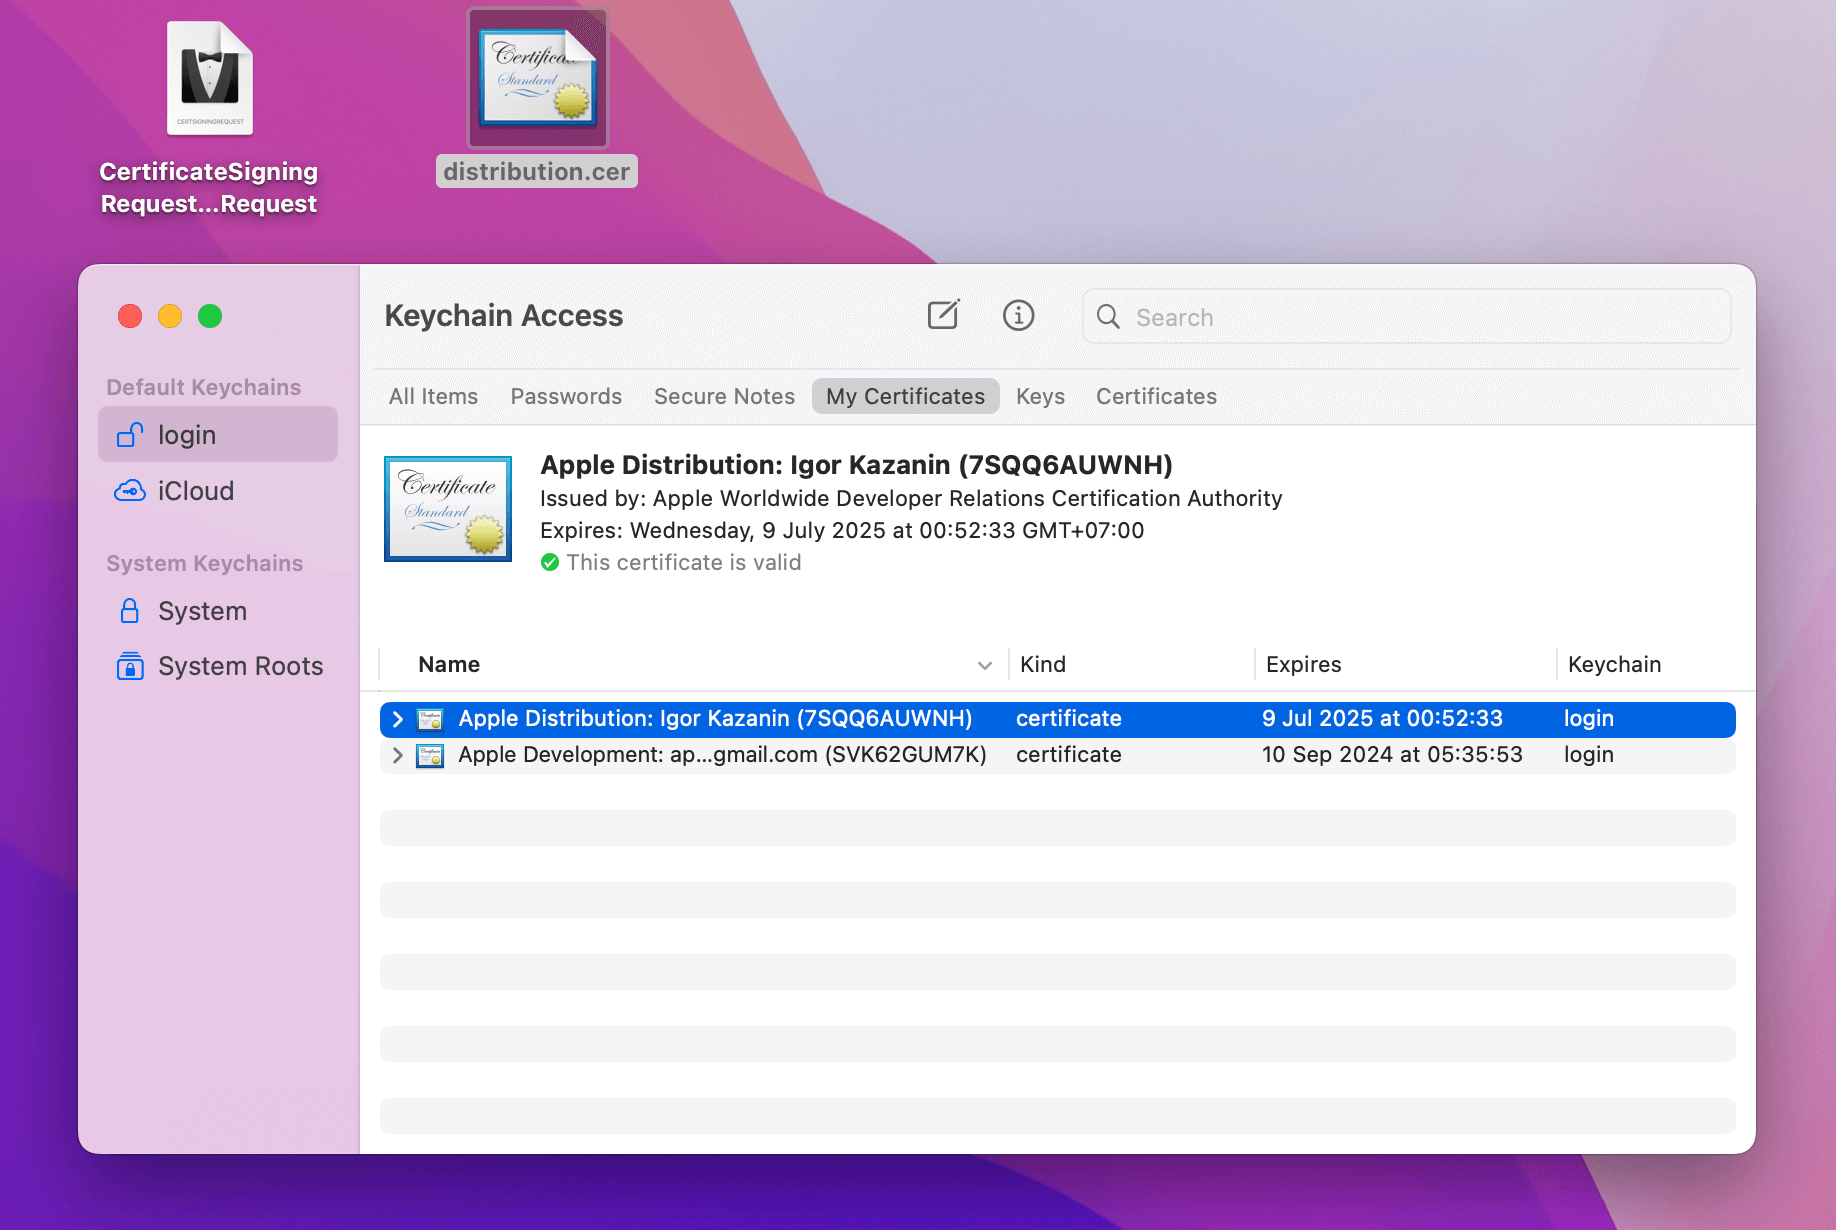
The certificate is ready — download it, it will still come in handy:
Merge certificate and key
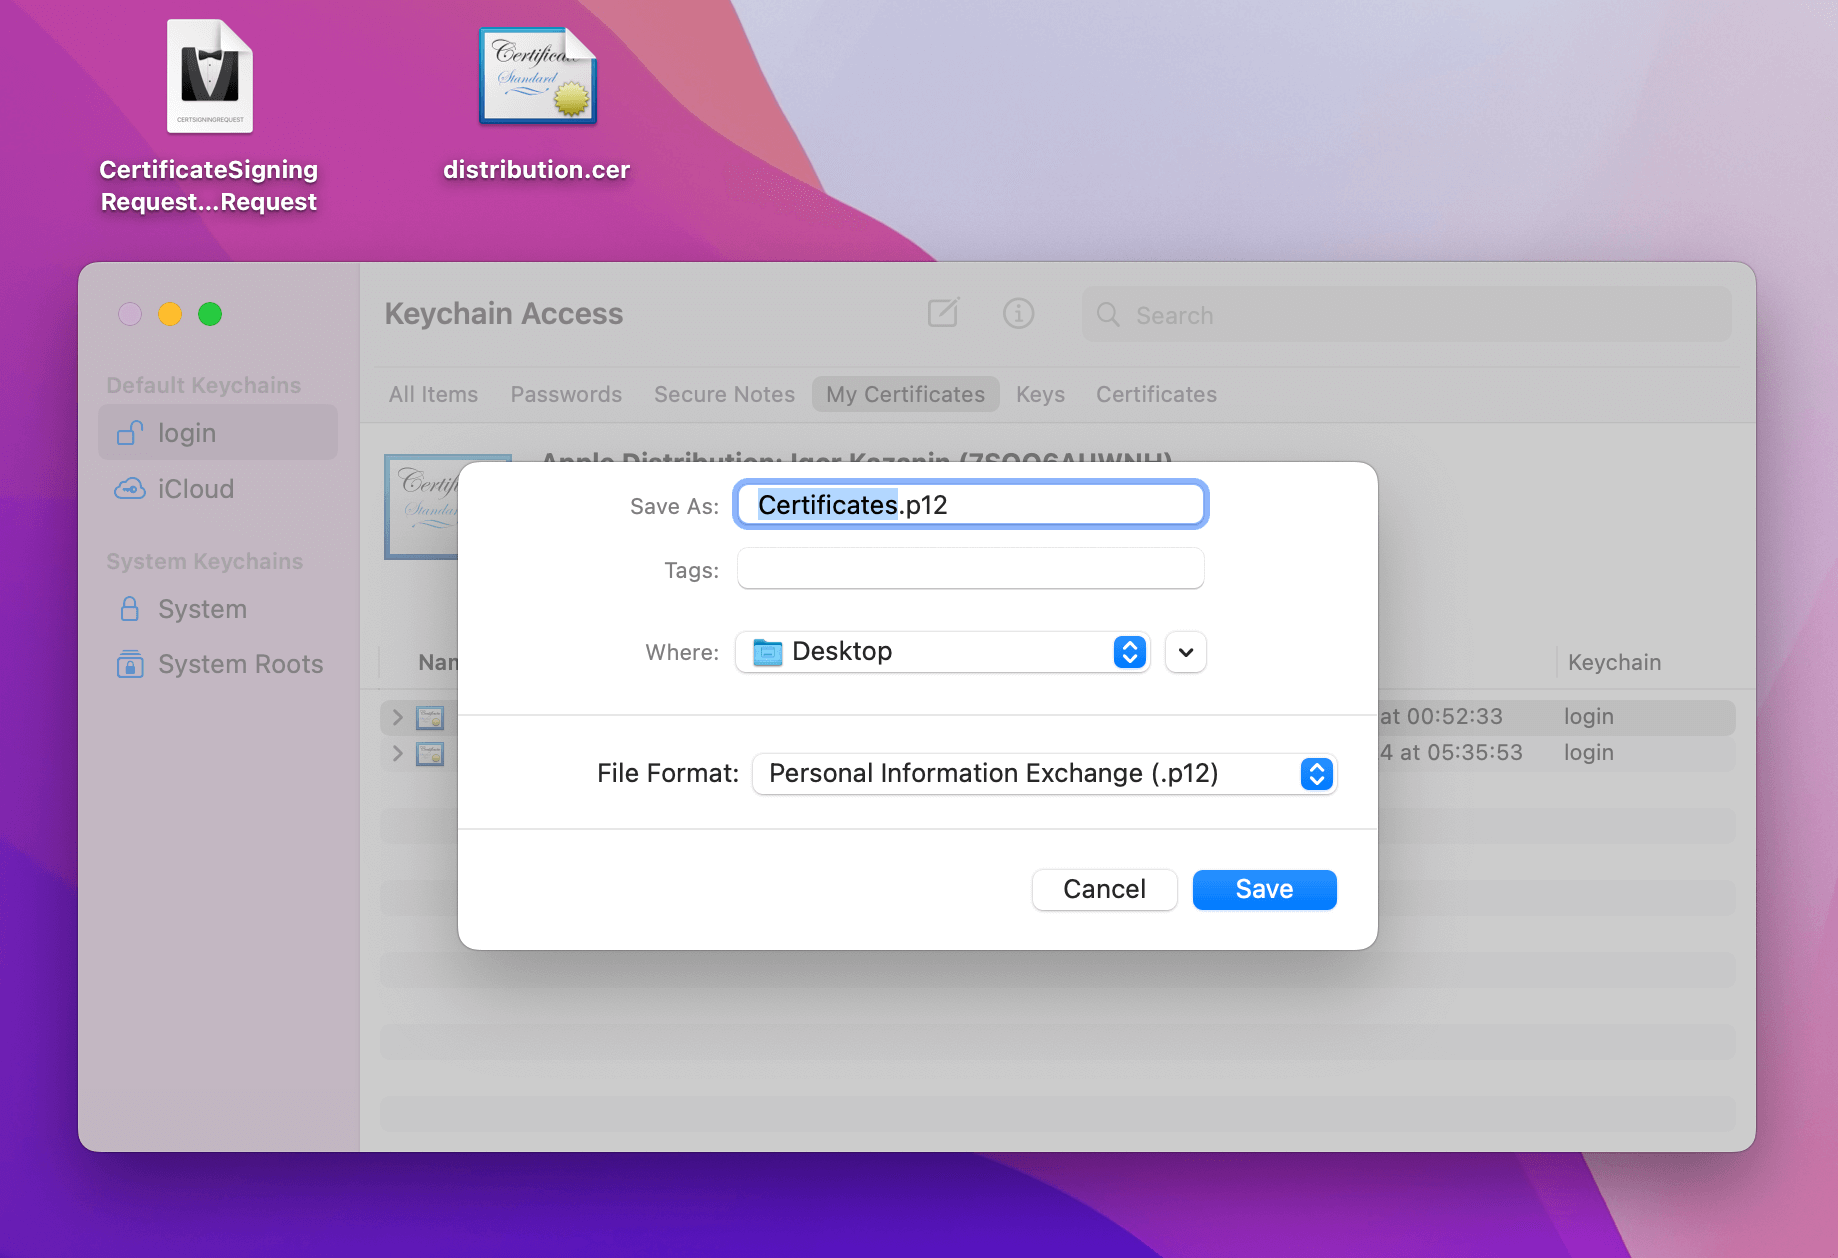
Next we need a file with the extension .p12. It stores the certificate-key mapping.
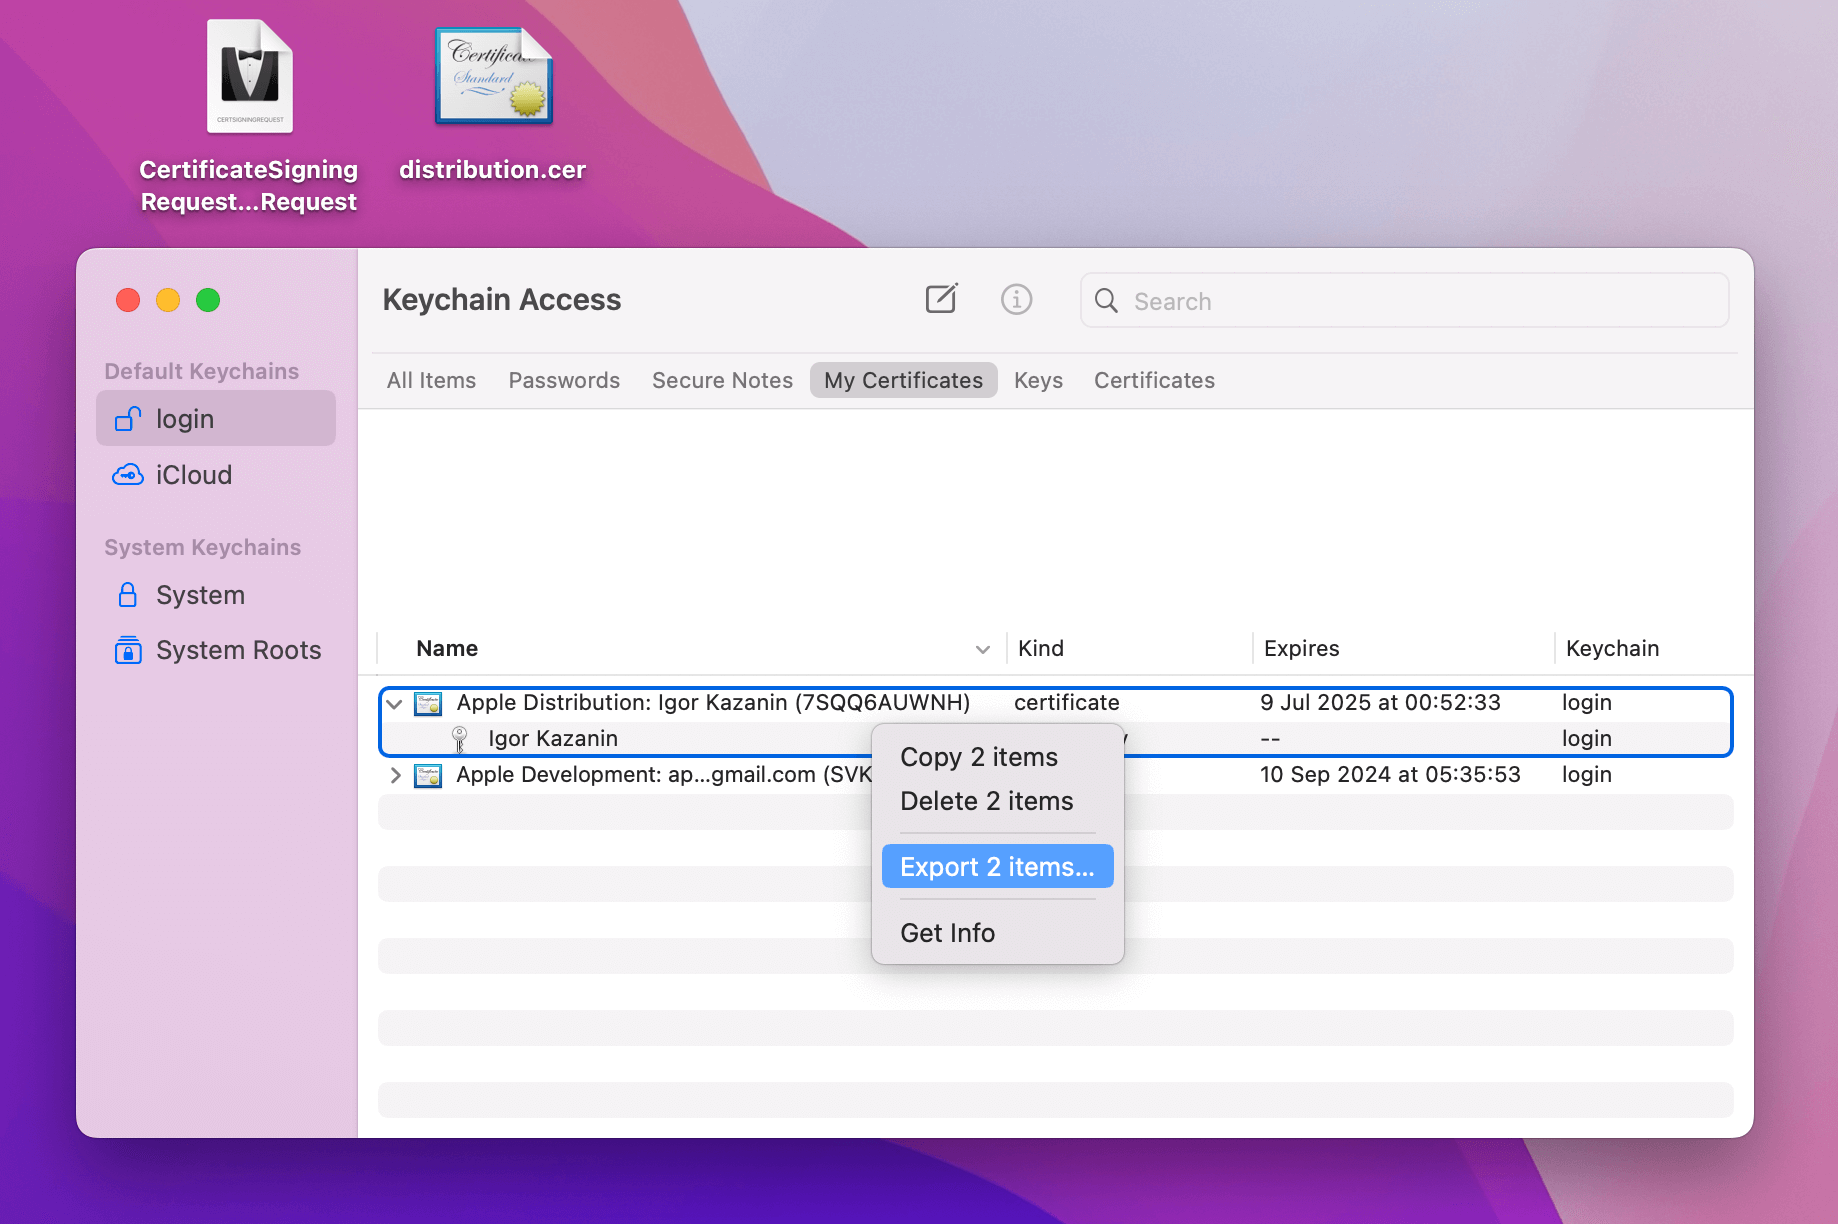
Double-click on the distribution.cer file and it will open Keychain Access.
Expand the drop-down box (to the left of the certificate), highlight the certificate and private key. Next, right-click and select Export 2 items....
Save the file:
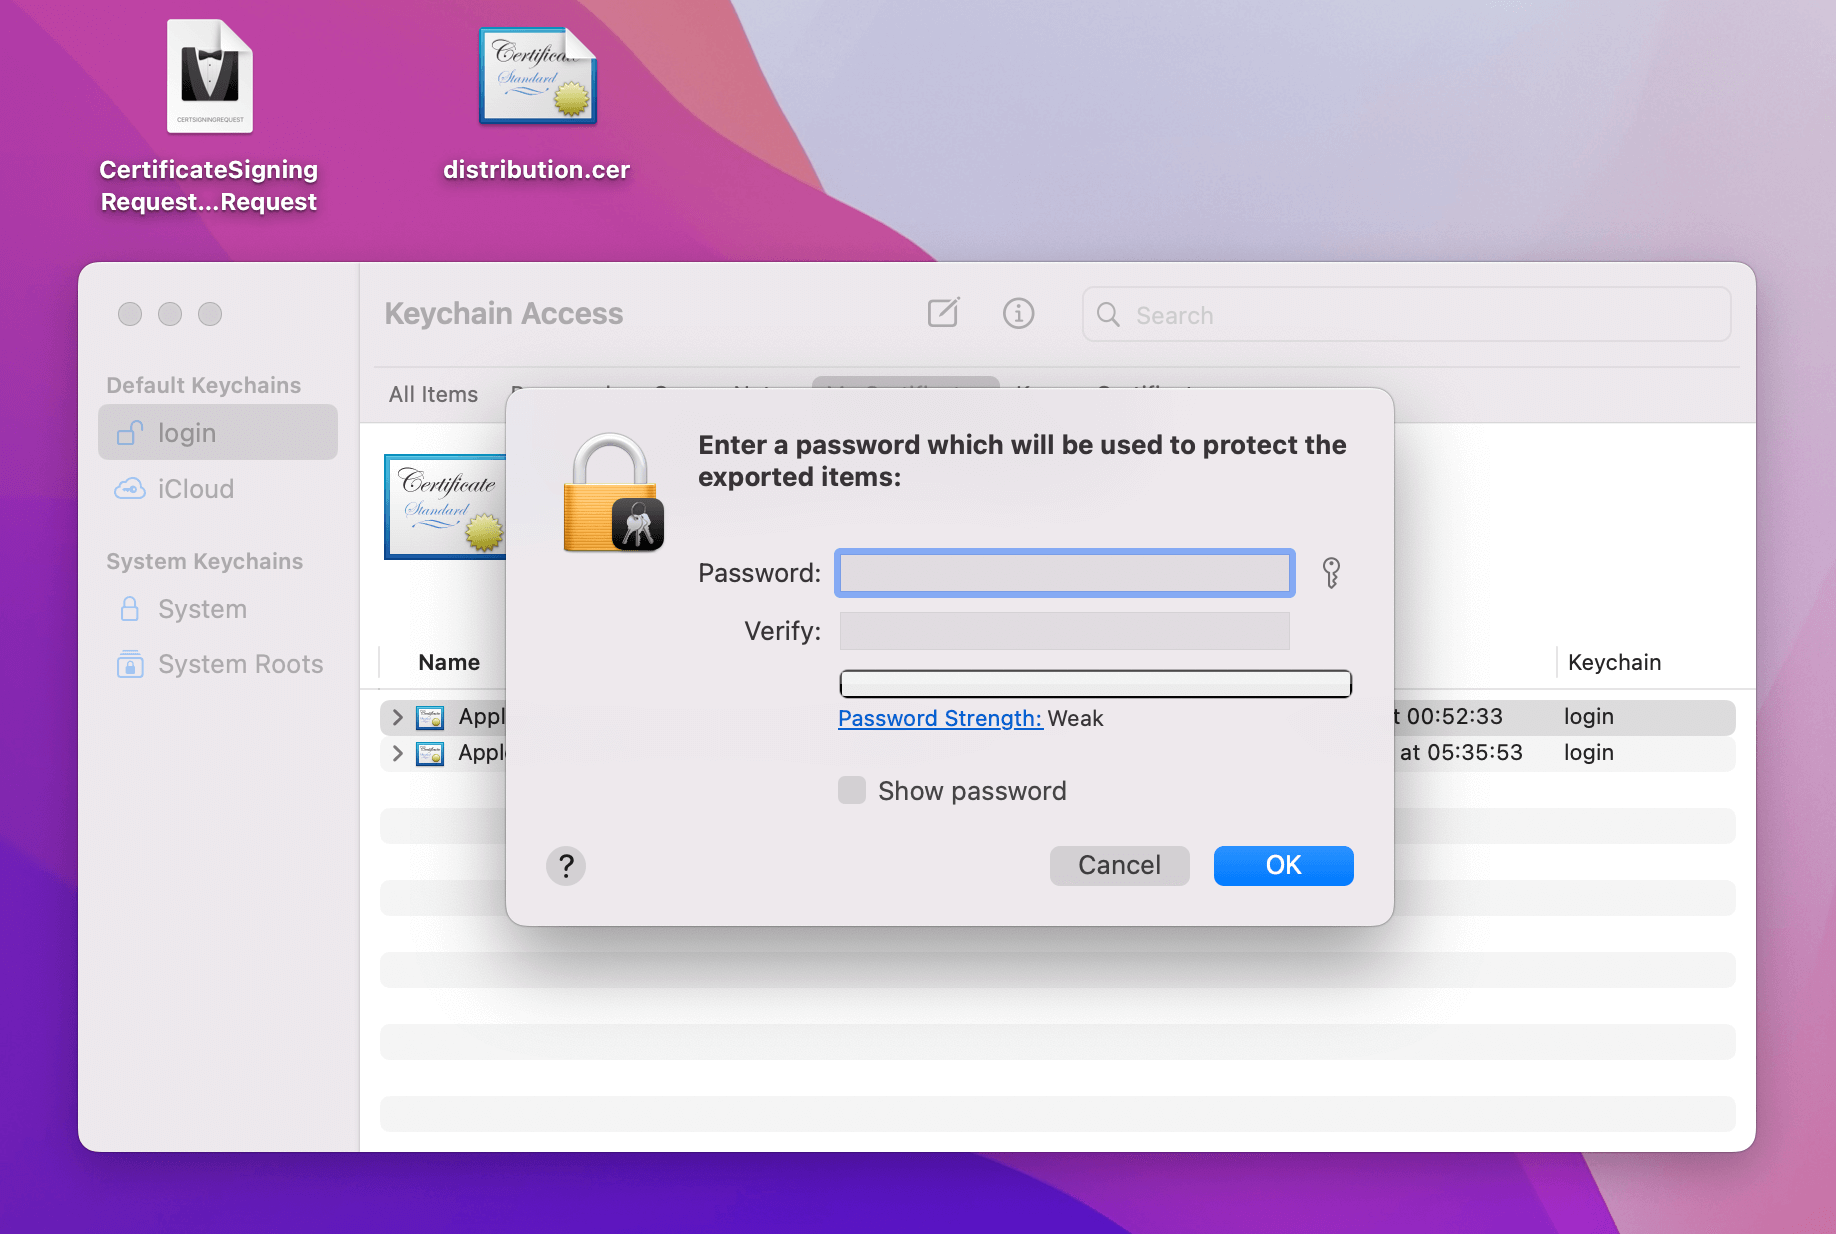
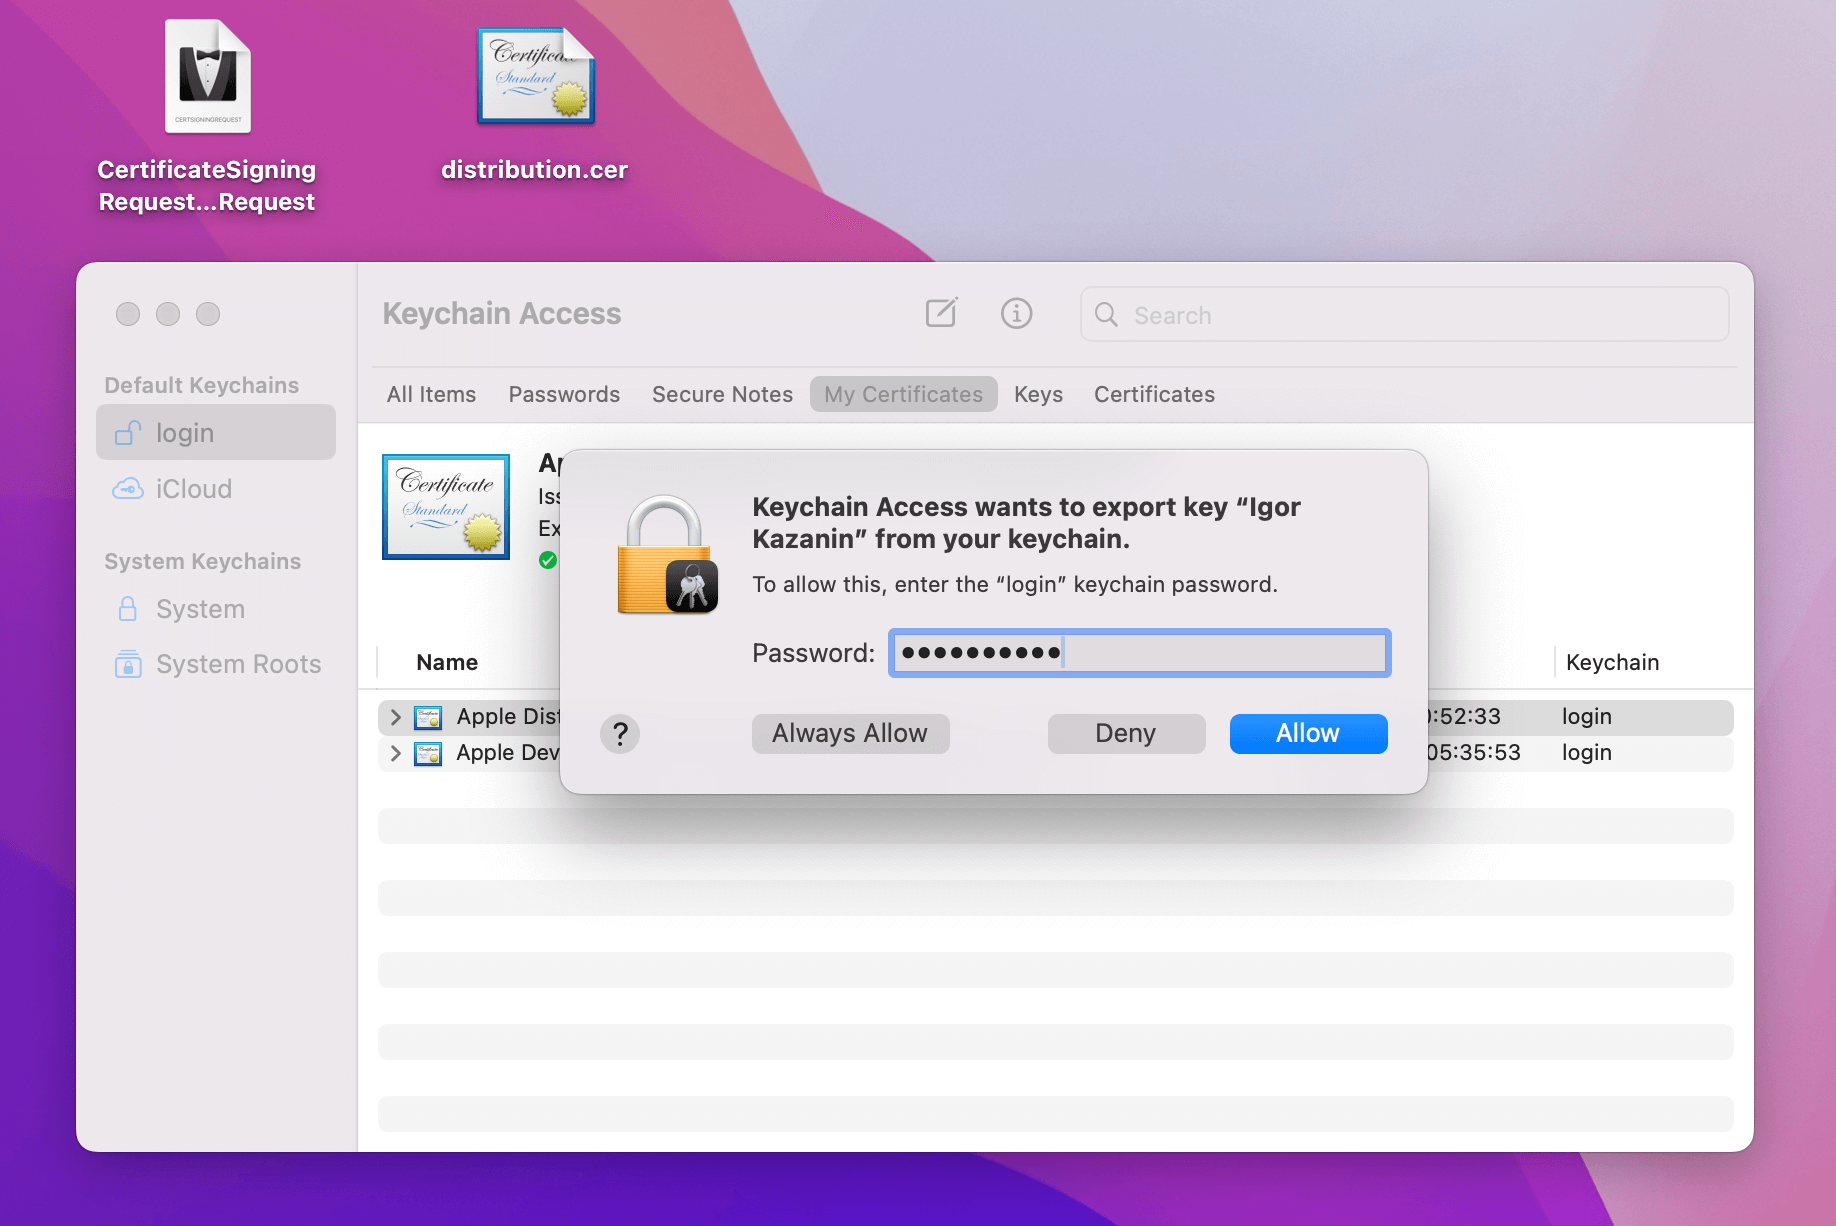
Set a password for the certificate, you can leave it blank:
It will ask for your mac password - enter it and click Always Allow:
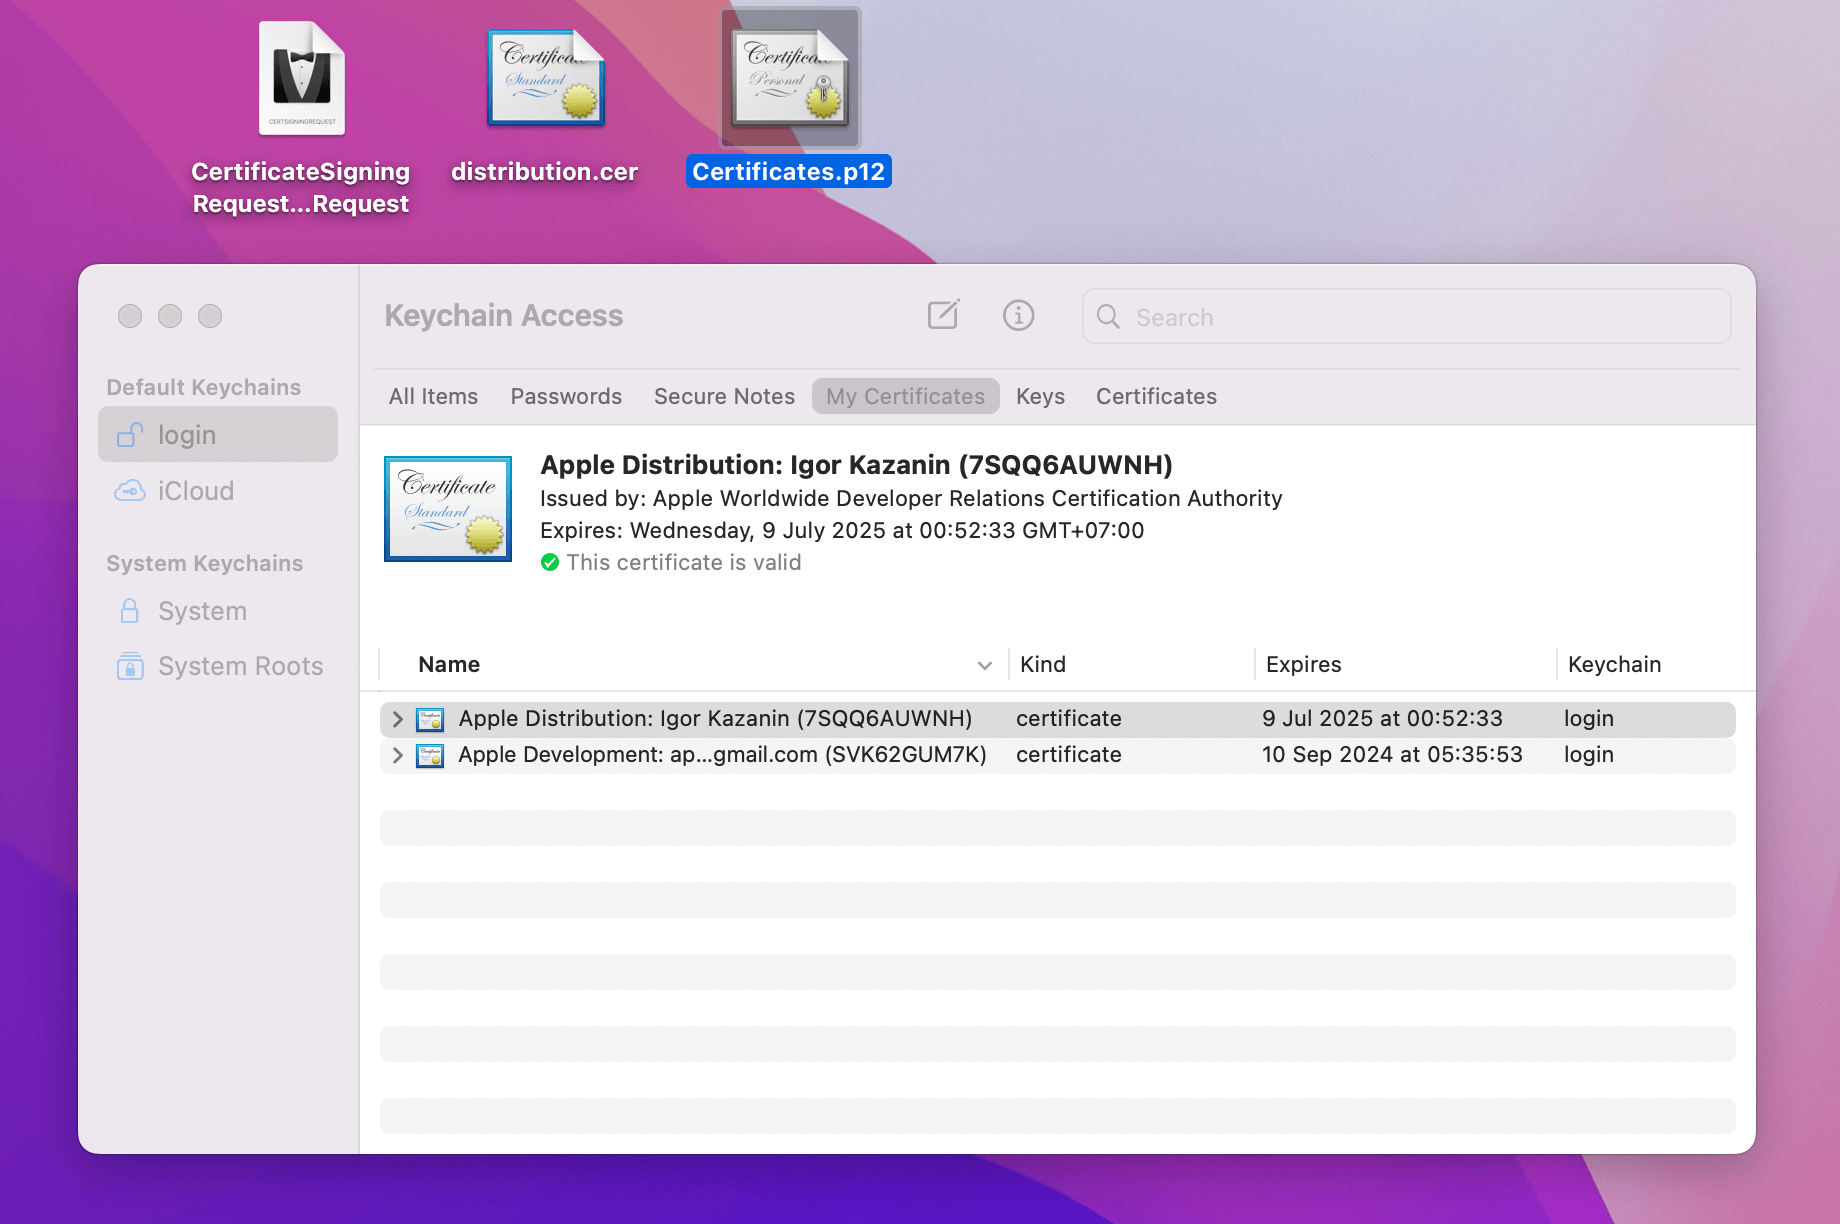
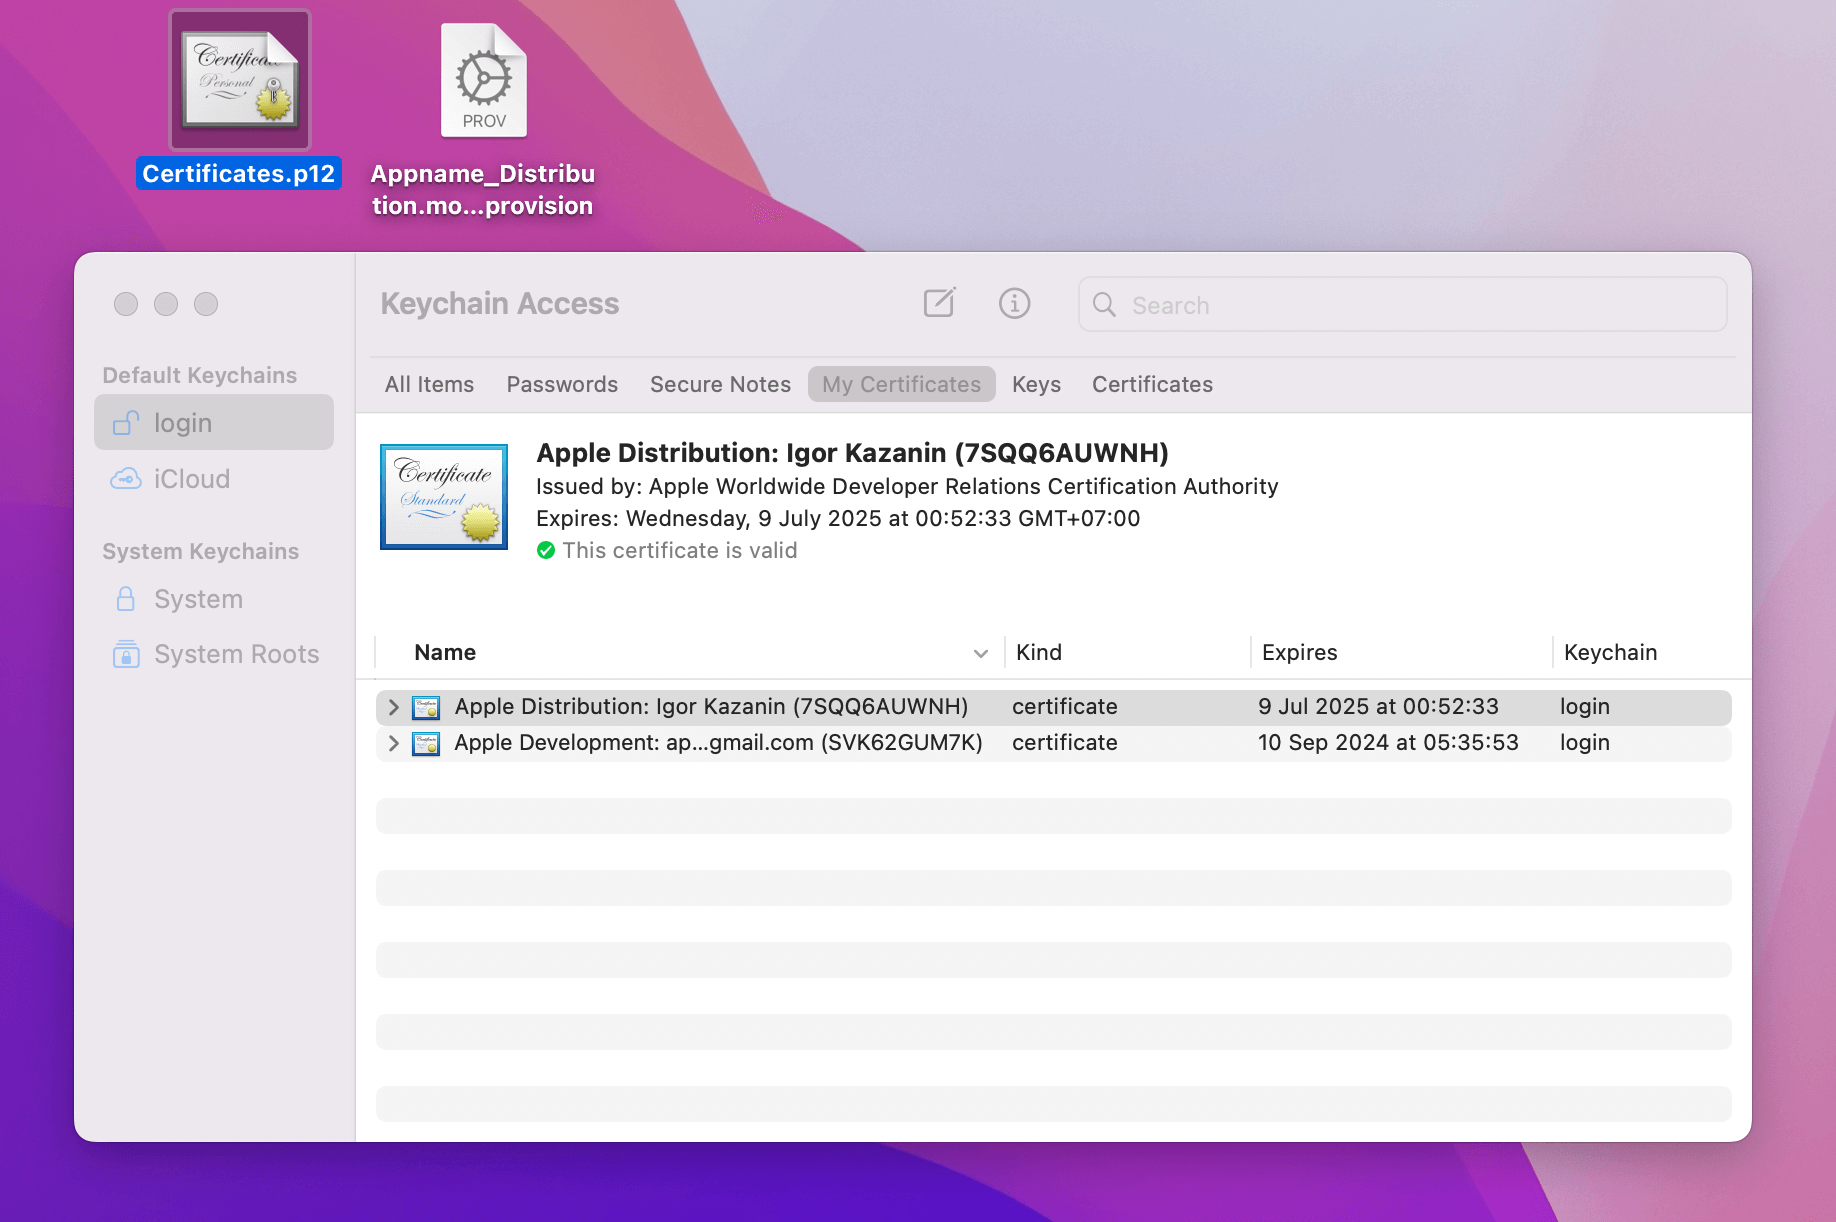
Get the file Certificates.p12:
Register the App
The App ID is a unique identifier for an app. It links apps to Apple services such as Push Notifications, iCloud, Game Center, etc.
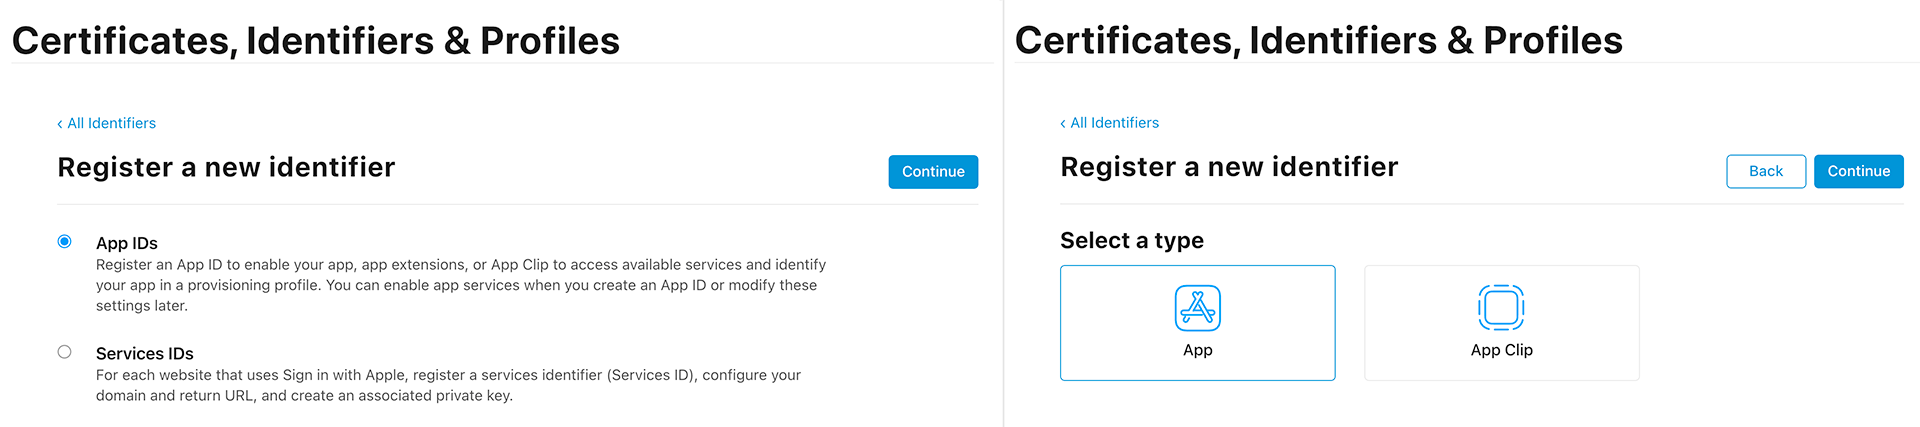
Go to Developer Account under the Identifiers tab and click the plus sign:

Select App IDs, then App:
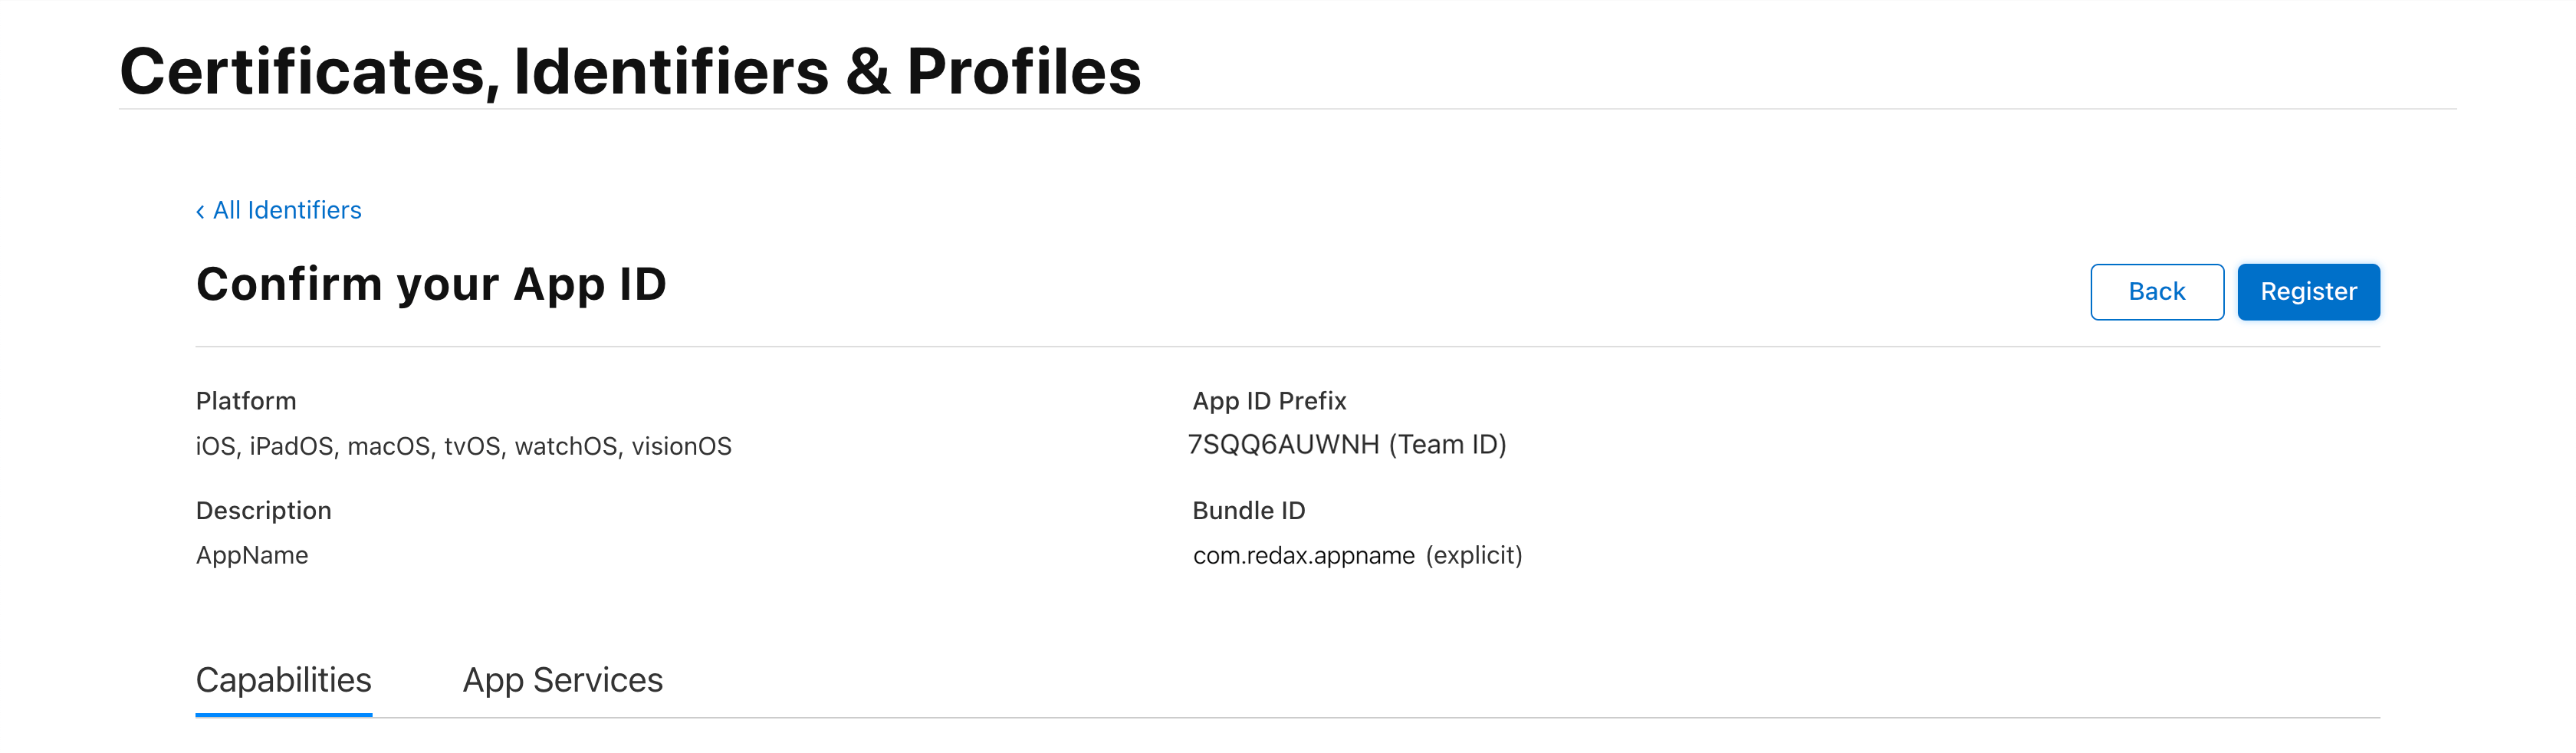
Here in Description enter the name of the app, and in Bundle ID enter the bundle. Explicit - used to sign only one application. Wildcard - used to sign multiple apps.
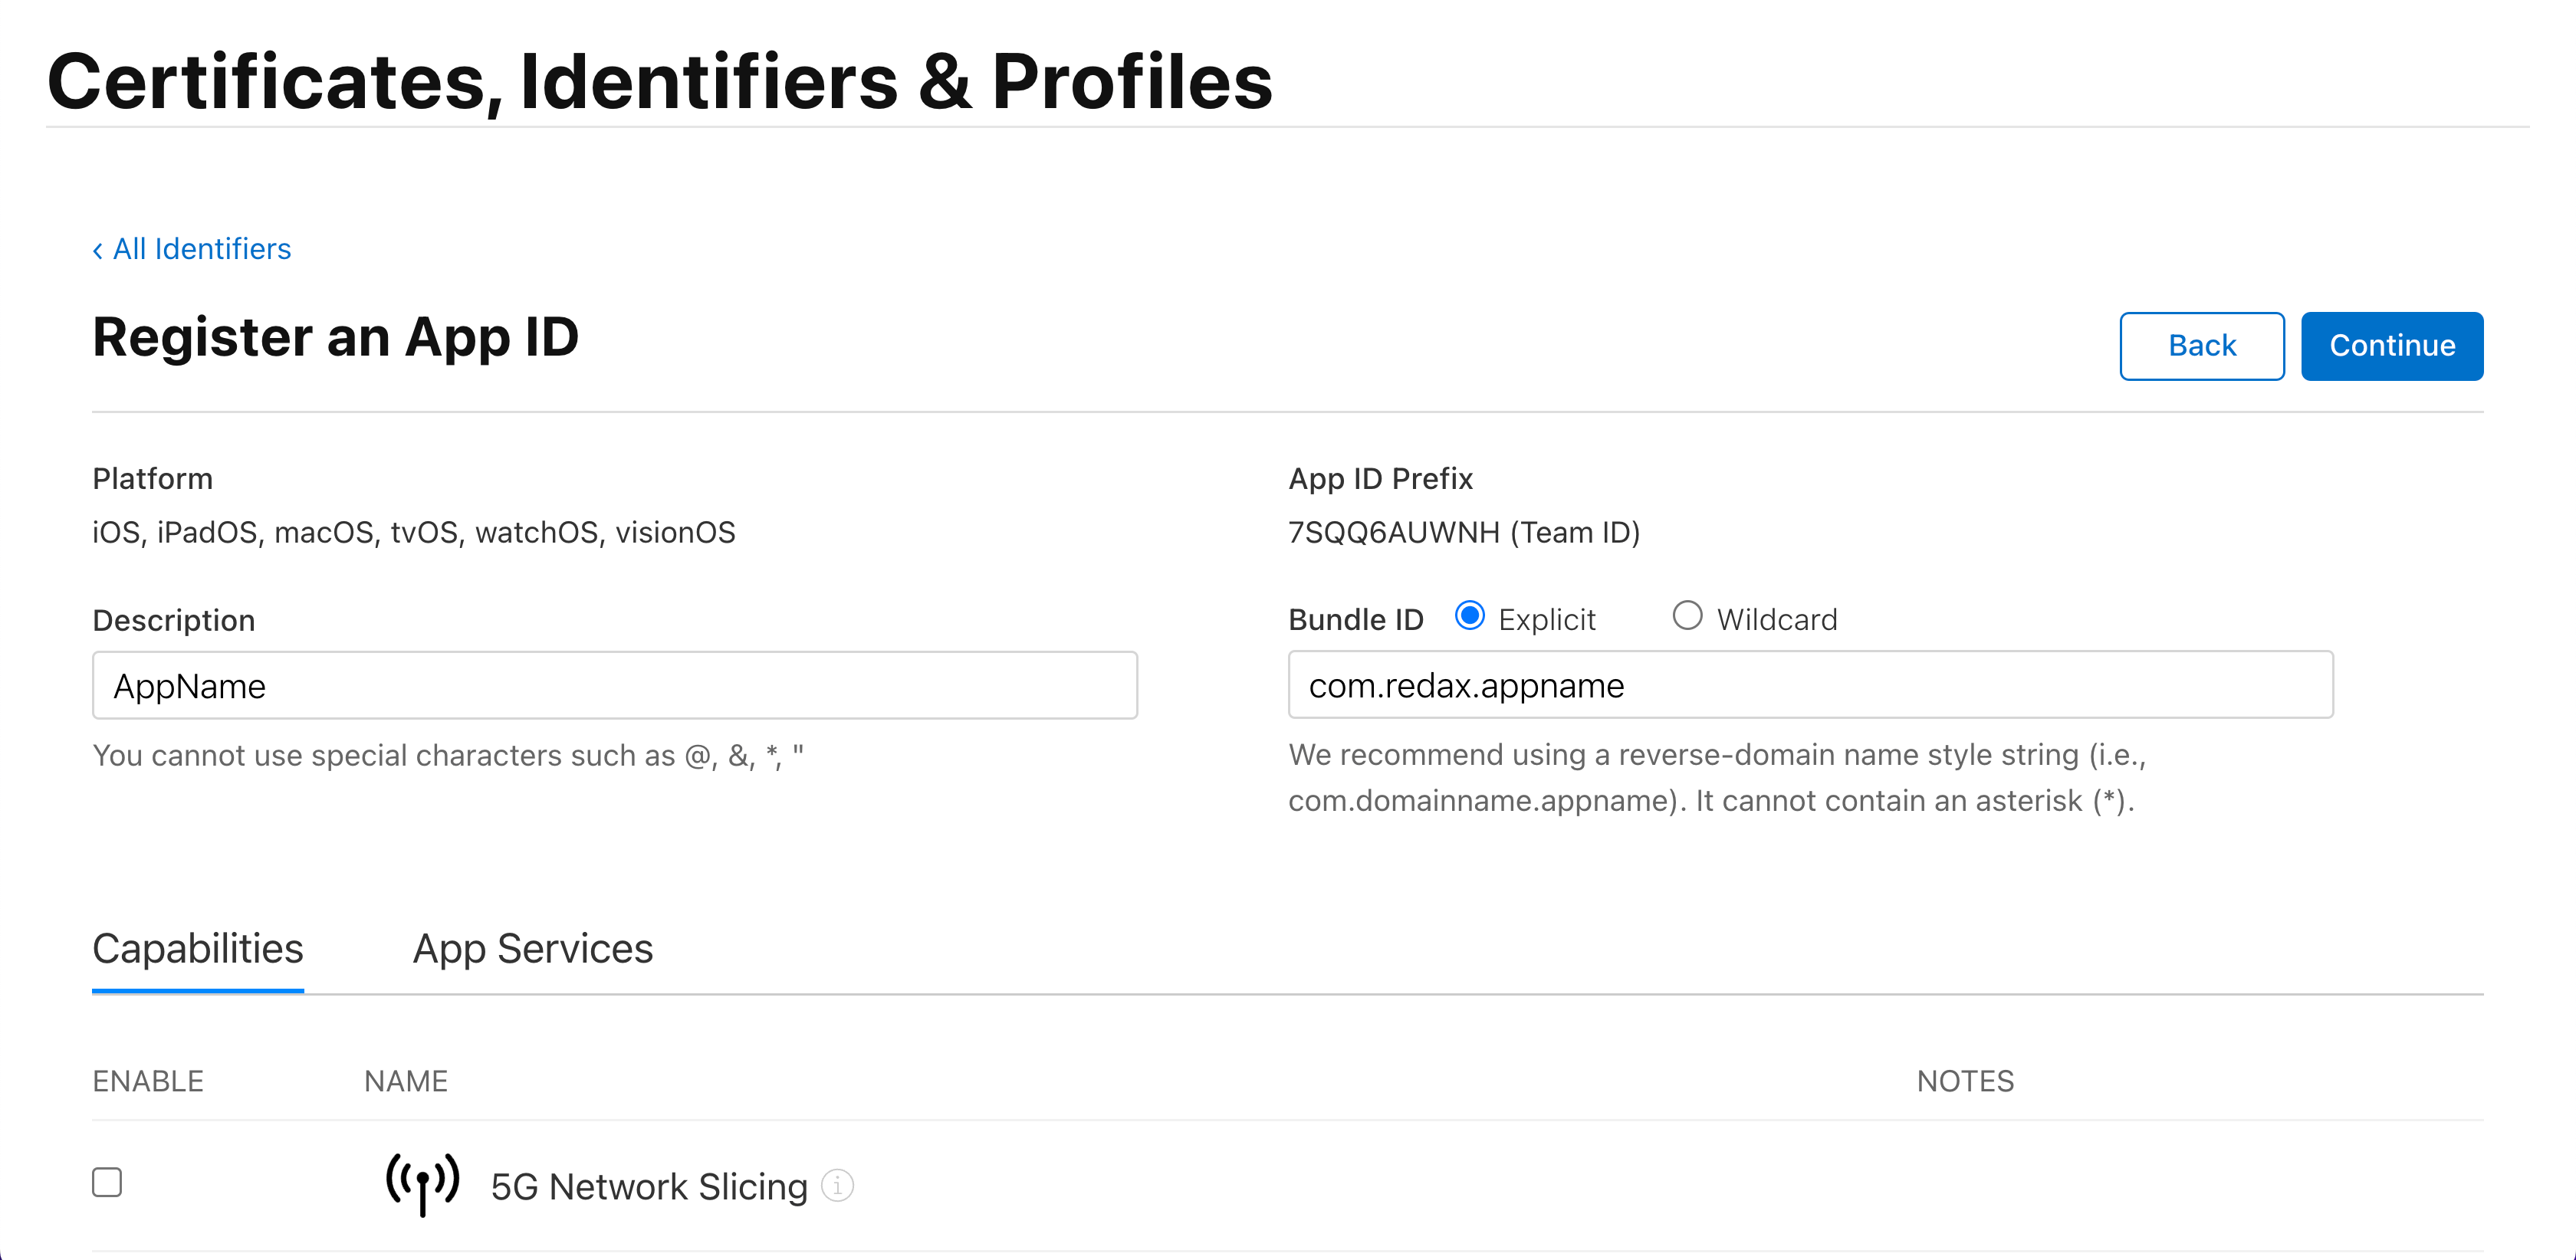
When you have filled in the fields, click Register:
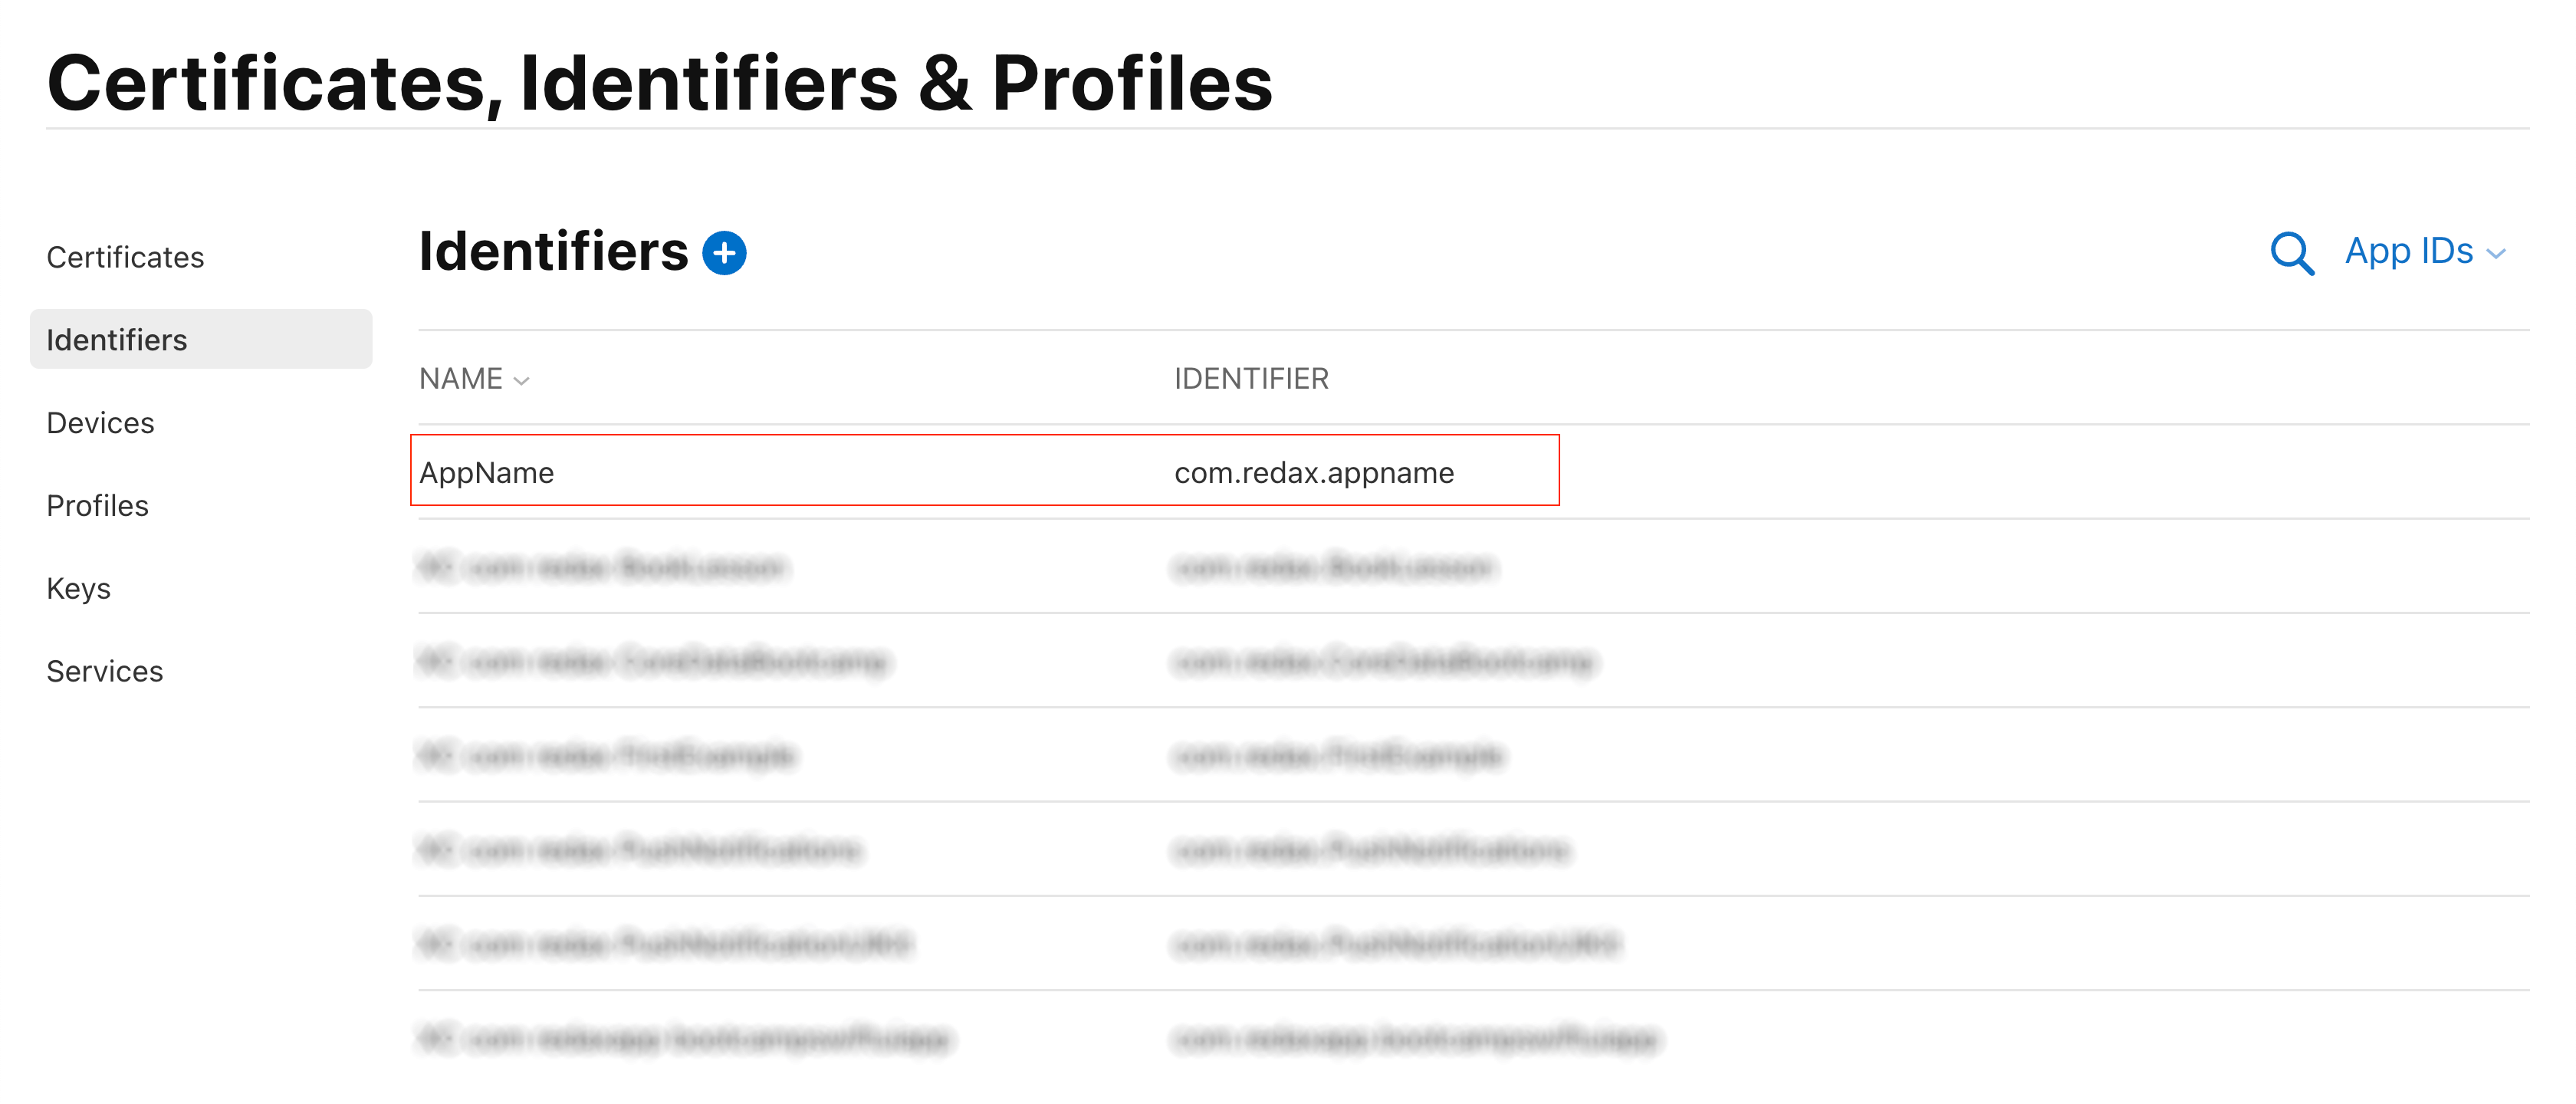
The Identifiers page will display the ID of the new app:
Provisioning Profile
The `Provisioning Profile' ties everything together: Apple Developer Account, App ID, certificates, and devices.
This is a file with the extension .mobileprovision.
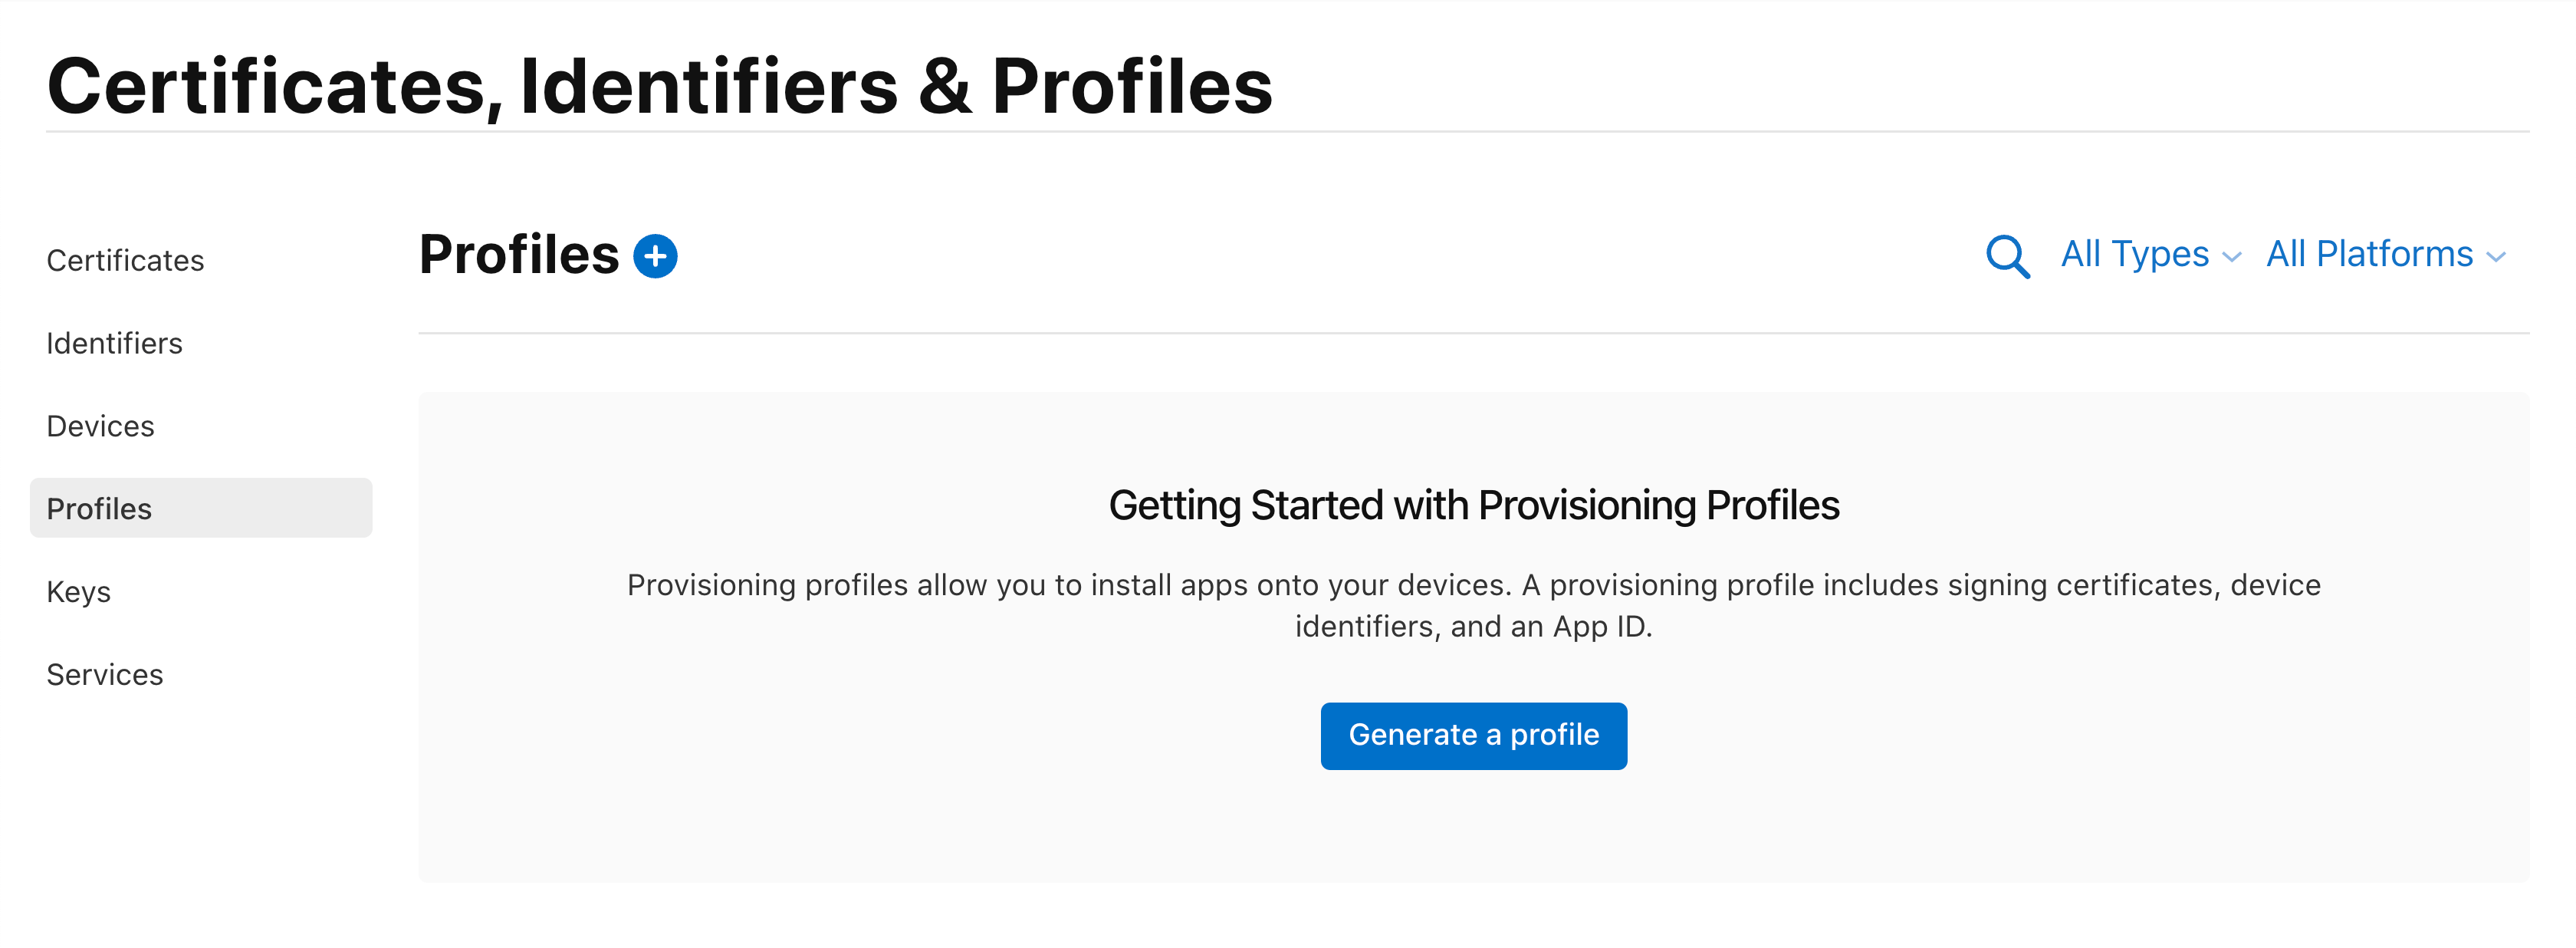
Go to the Profiles tab, click the Generate a profile button:
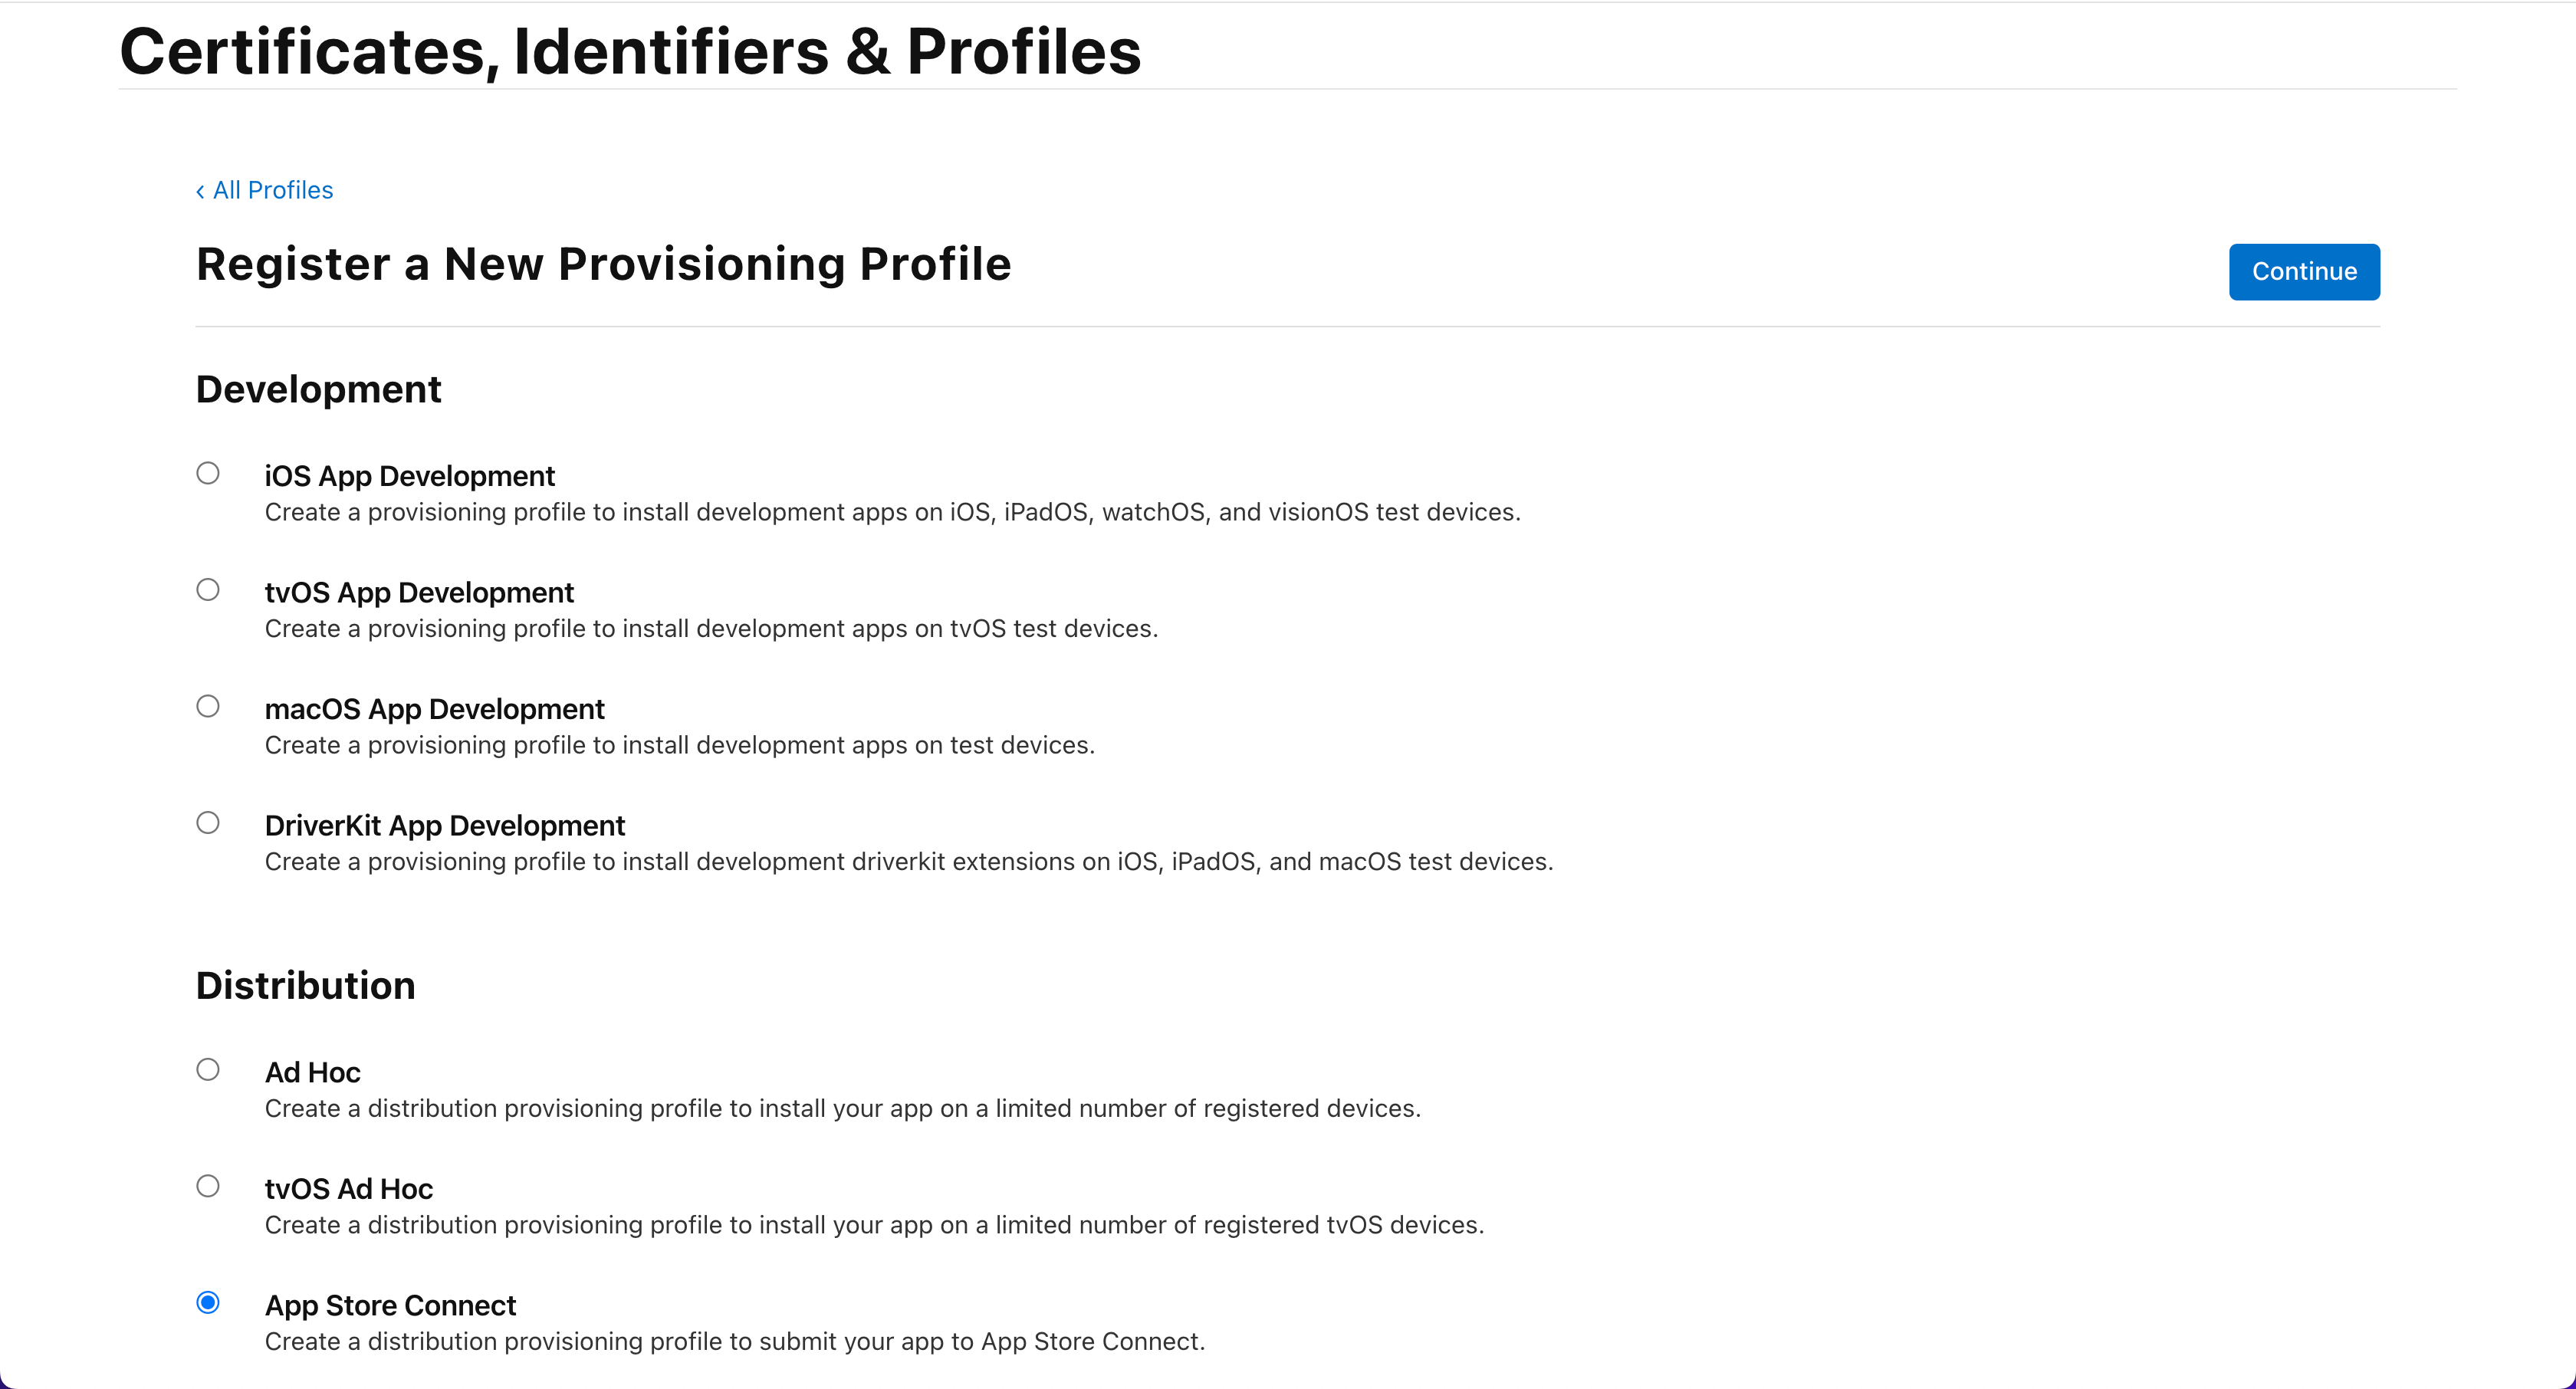
Select App Store Connect:
In App ID select the desired Bundle ID from the list:

Select the newly created certificate (check the date when it expires):
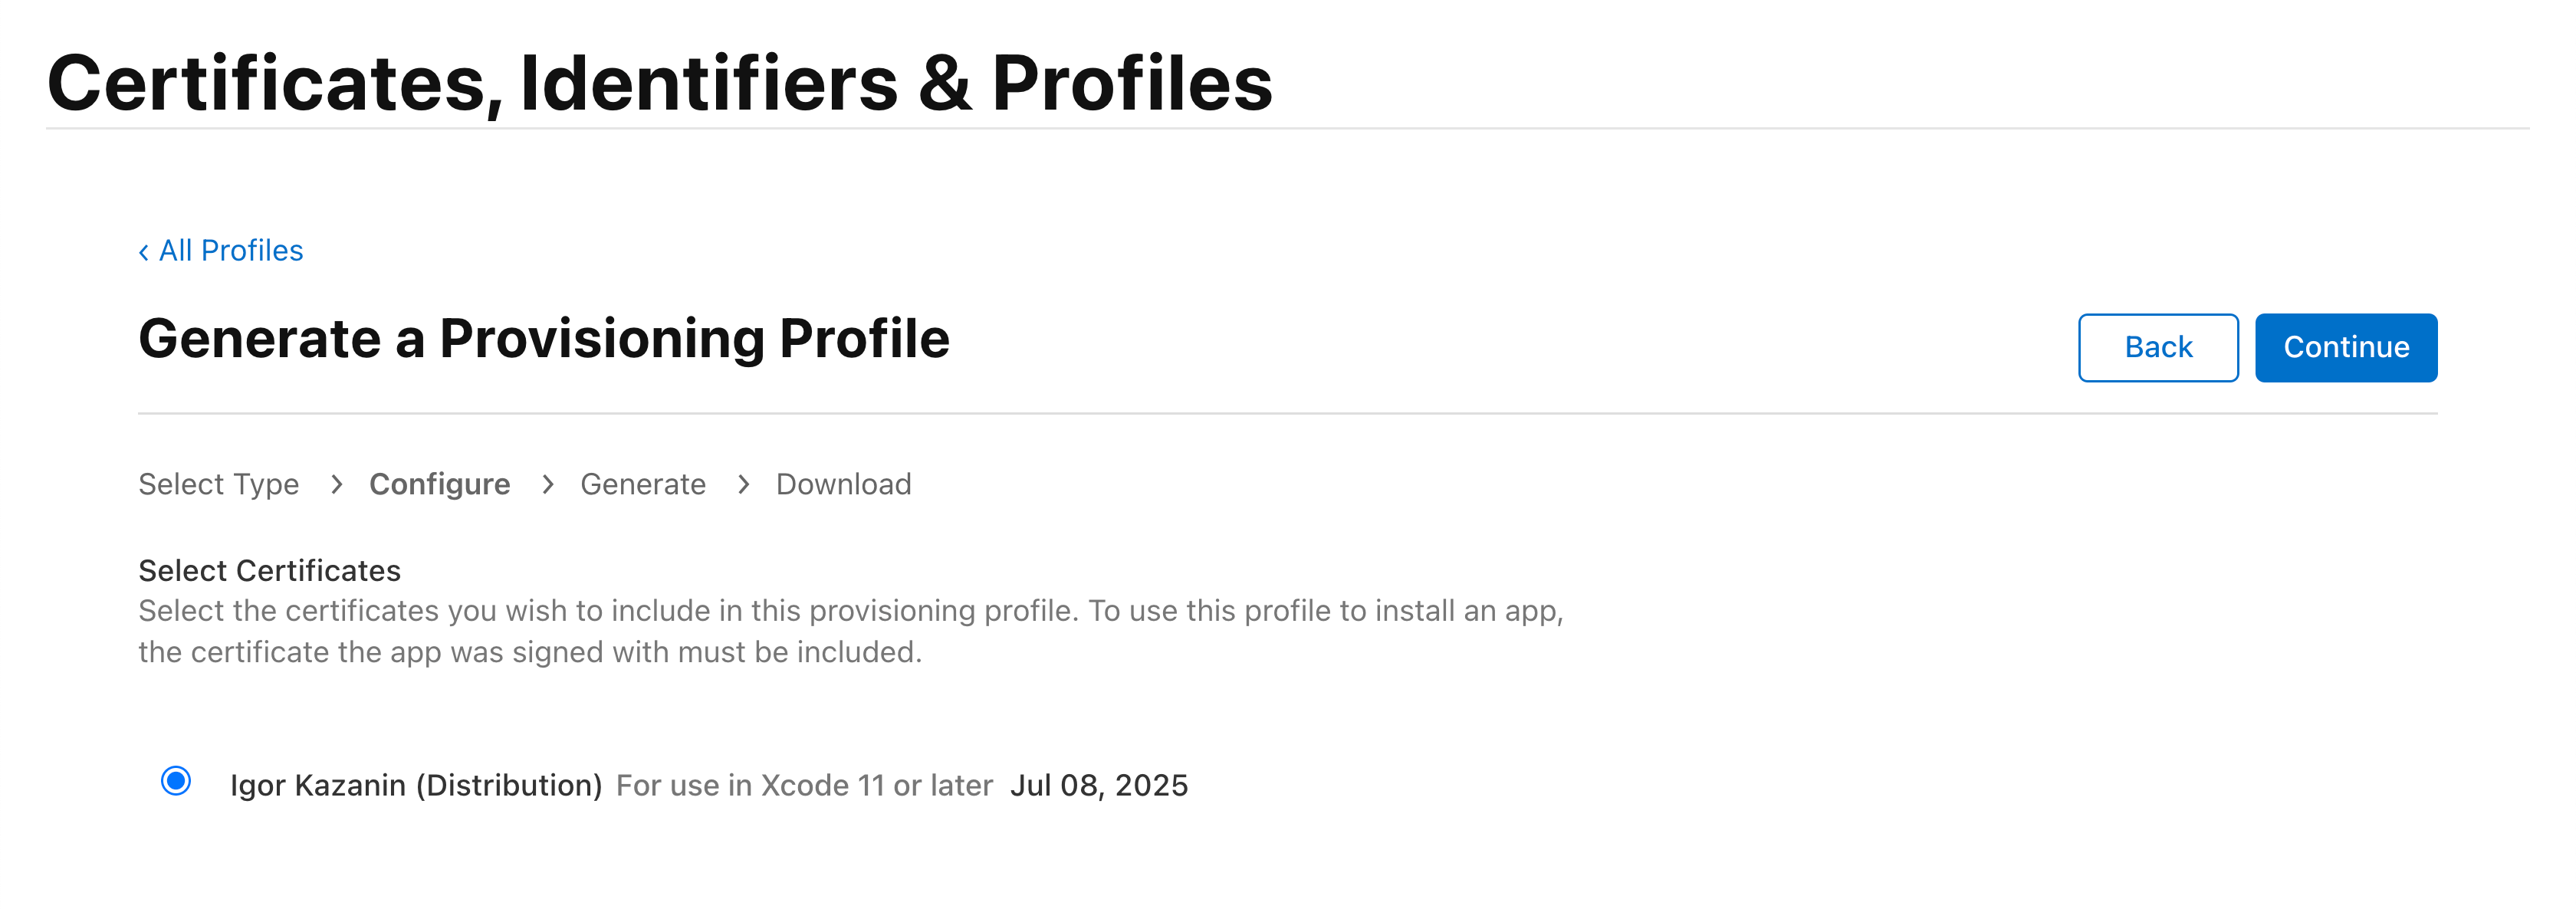
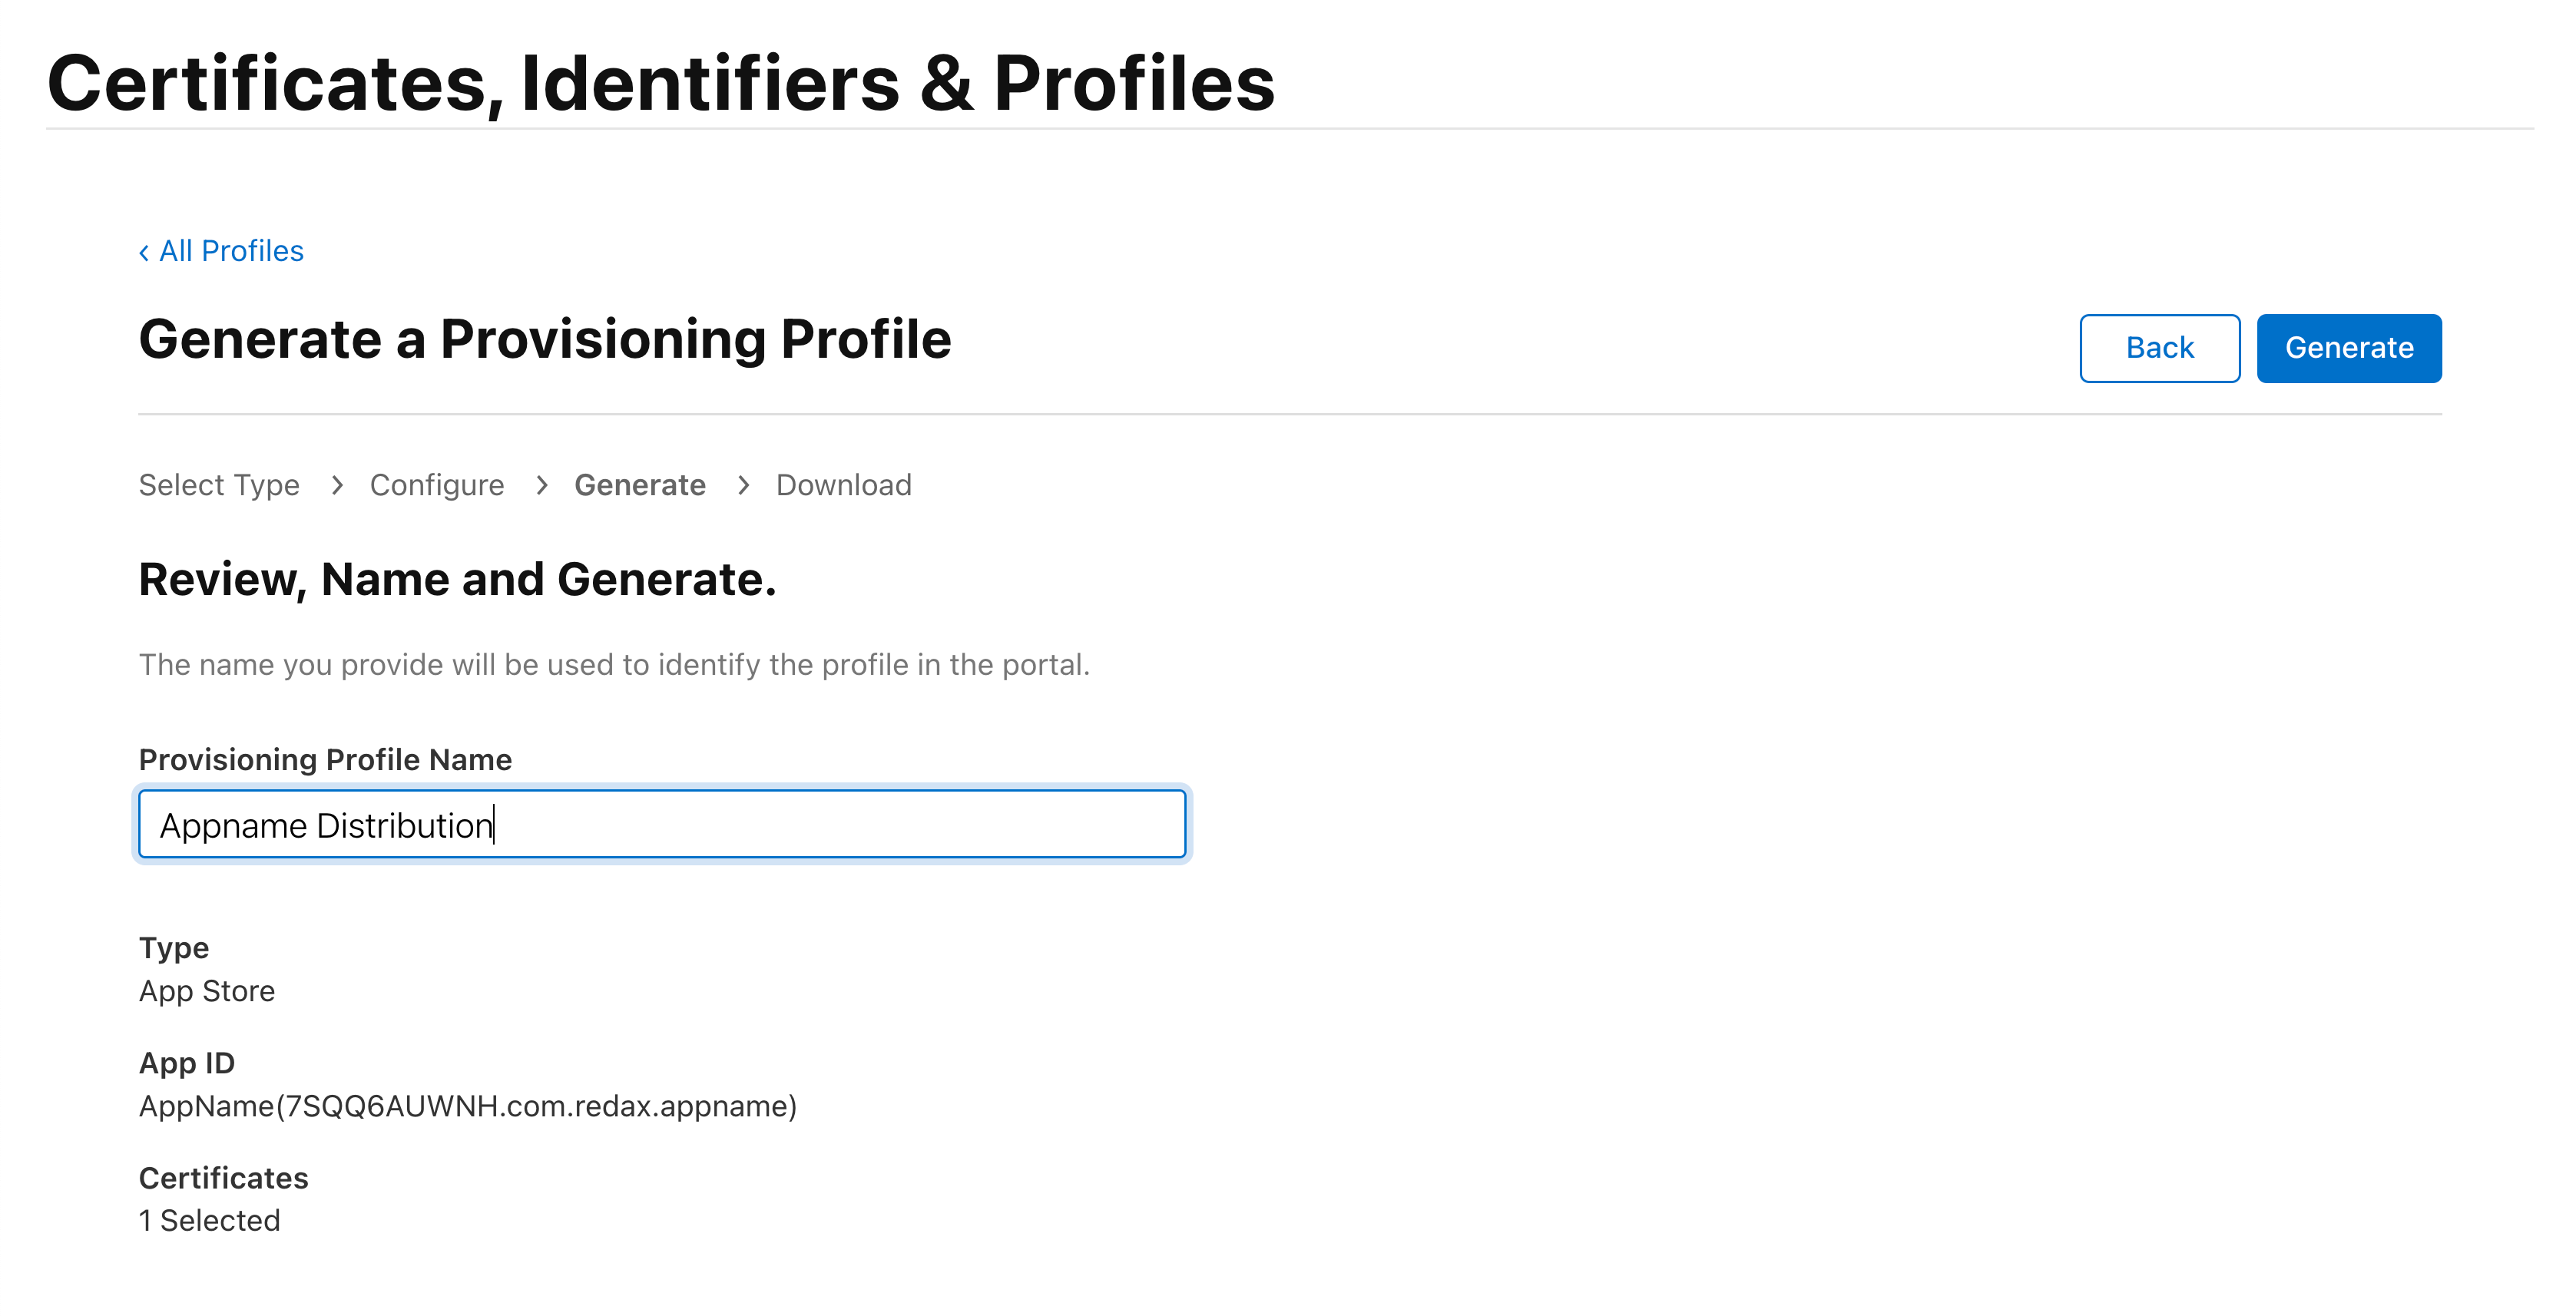
Fill in the Provisioning Profile Name and click Generate:
All that's left is to download the file:
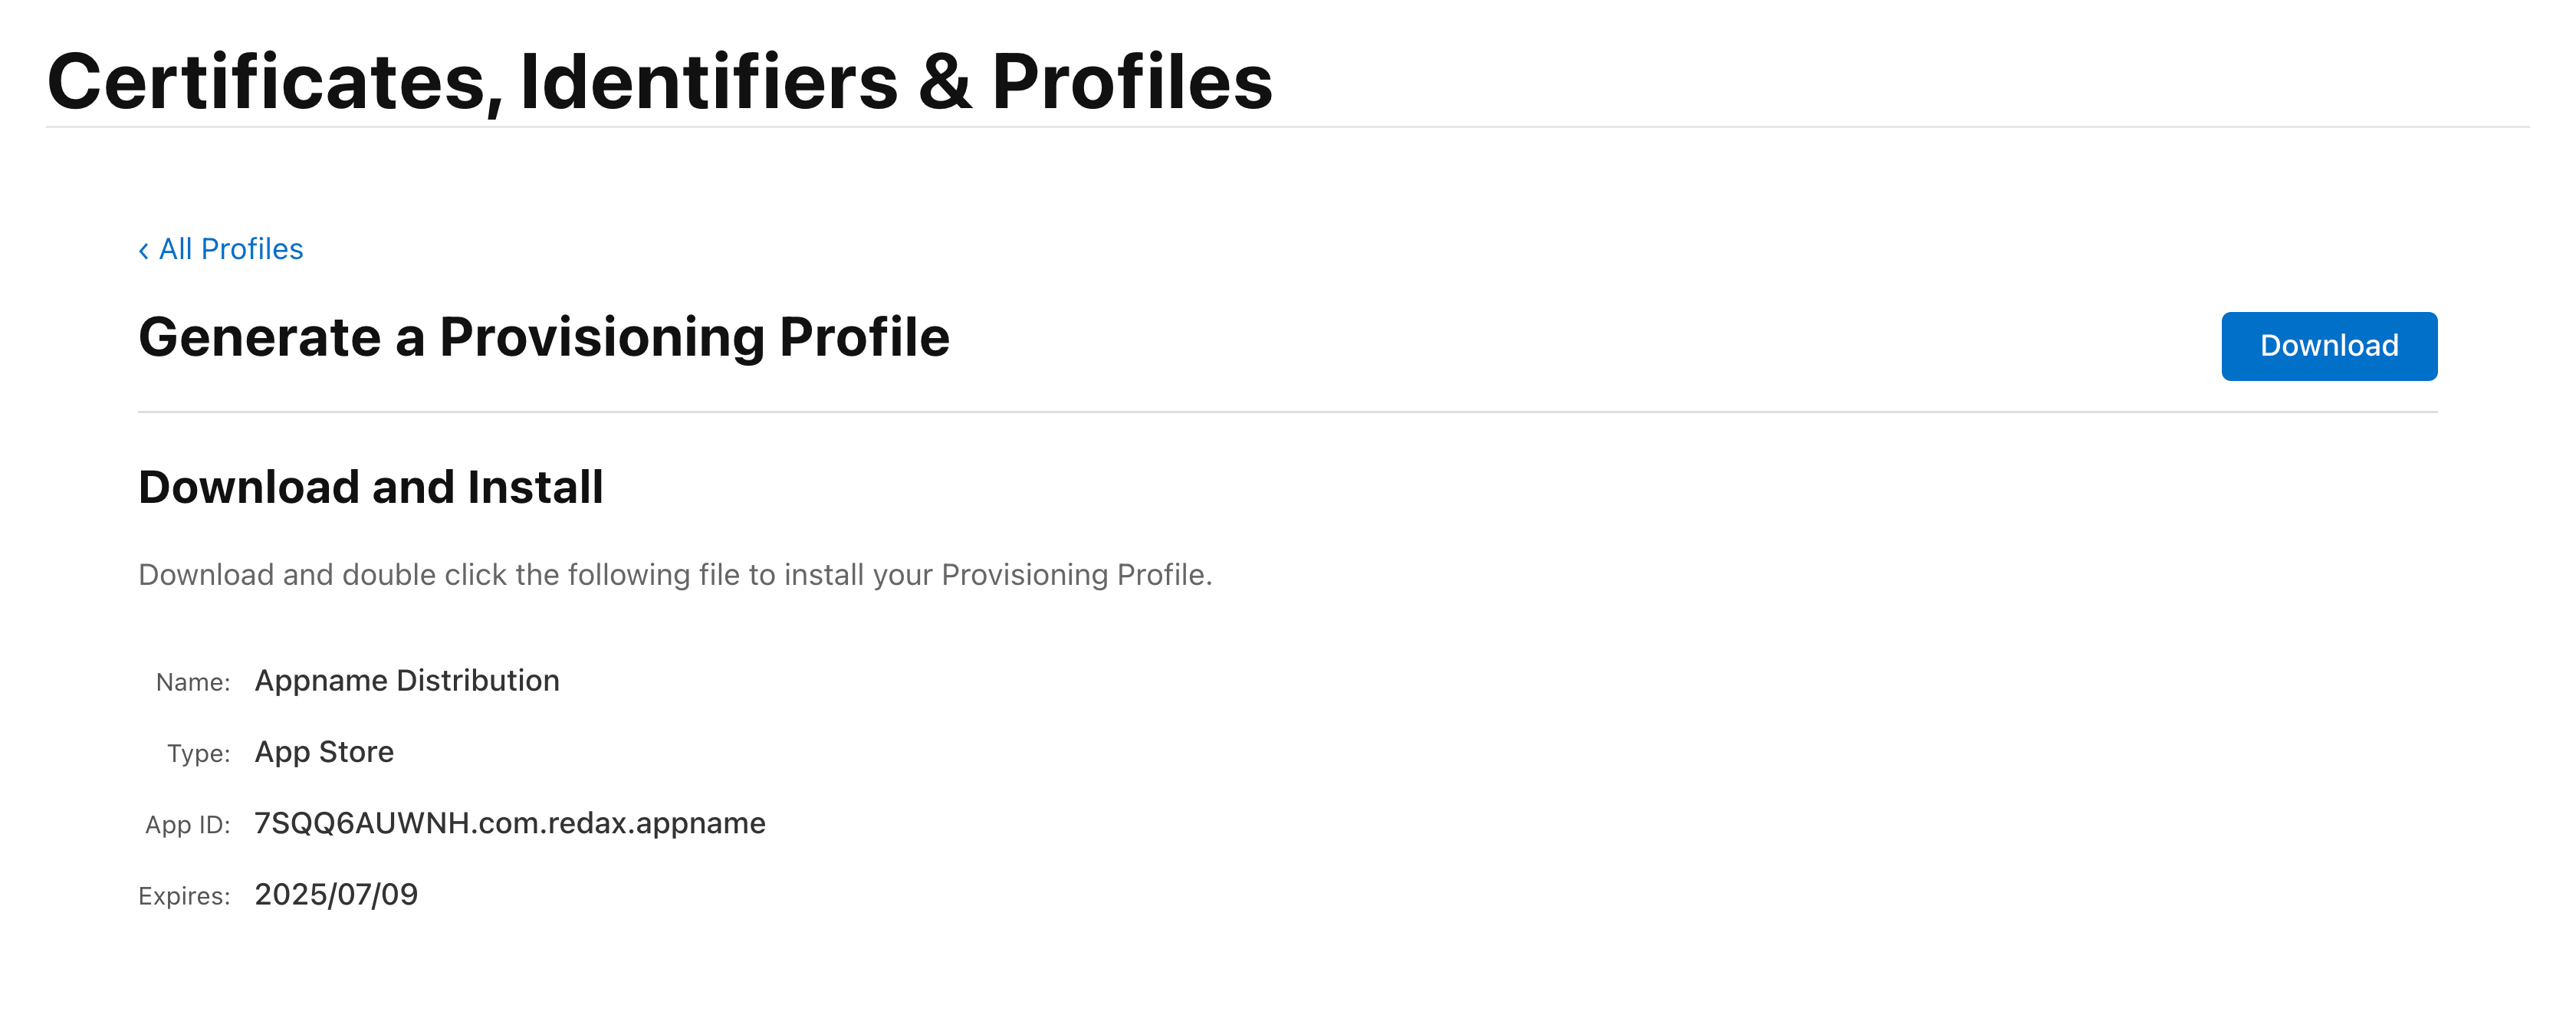
We get a file with your name and extension .mobileprovision:
Transfer files to the developer
Pass the .p12 file and Provision Profile to the developer. Next, the developer needs to double-click the .p12 file or import it into Keychain Access:
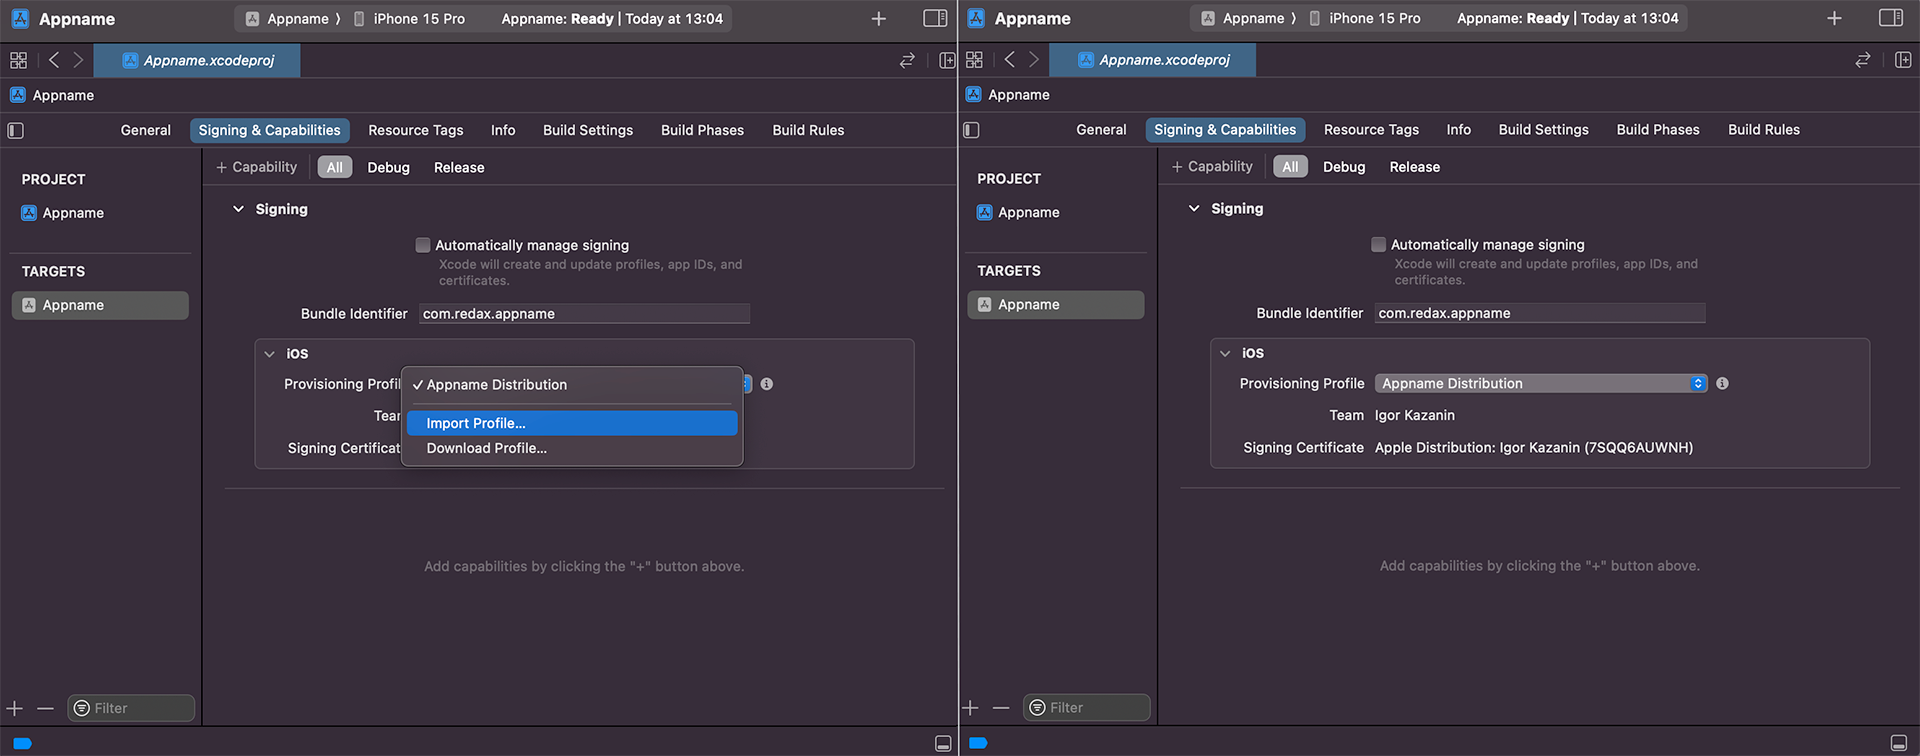
Now the developer goes to Xcode-project - Project Settings and selects the target. On the Signing & Capabilities tab disable Automatically manage signing, select Team ID and import Provisioning Profile:
Done! The developer will be able to upload apps to an individual account.