Live Activity combines push notifications into one interactive banner. For example, when a cab pulls up, you get a push that the driver is coming, the driver is nearby, and the driver is waiting. With the new tool, developers will be able to merge push notifications into Live Activity and update it.
Live Activity is not a widget - there are no timelines and therefore no updates by time. The main way to update is by pushing. See how to update and terminate Live Activity for the update methods.

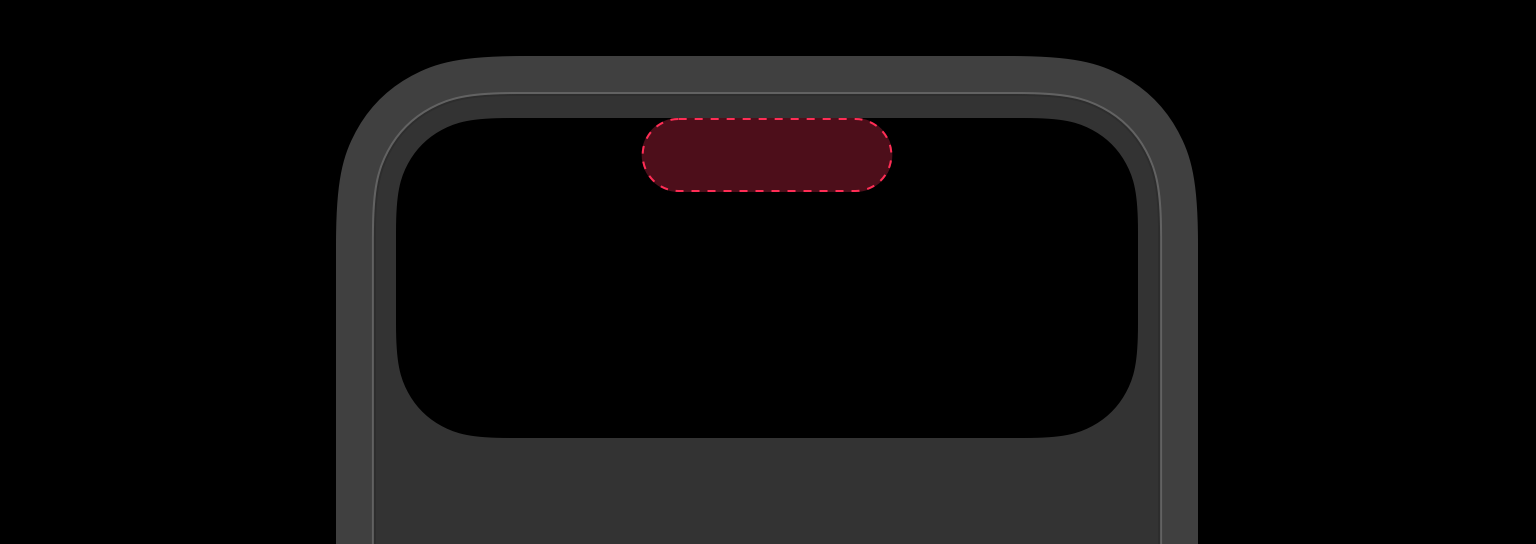
Live Activity is shown on devices with and without Dynamic Island. On a locked screen, it will look like a normal push notification. For devices with Dynamic Island, Live Activity is shown around the cameras.
Adding Live Activity to the project
Live Activity uses the ActivityKit framework. Live Activity lives in the widget's targeting:
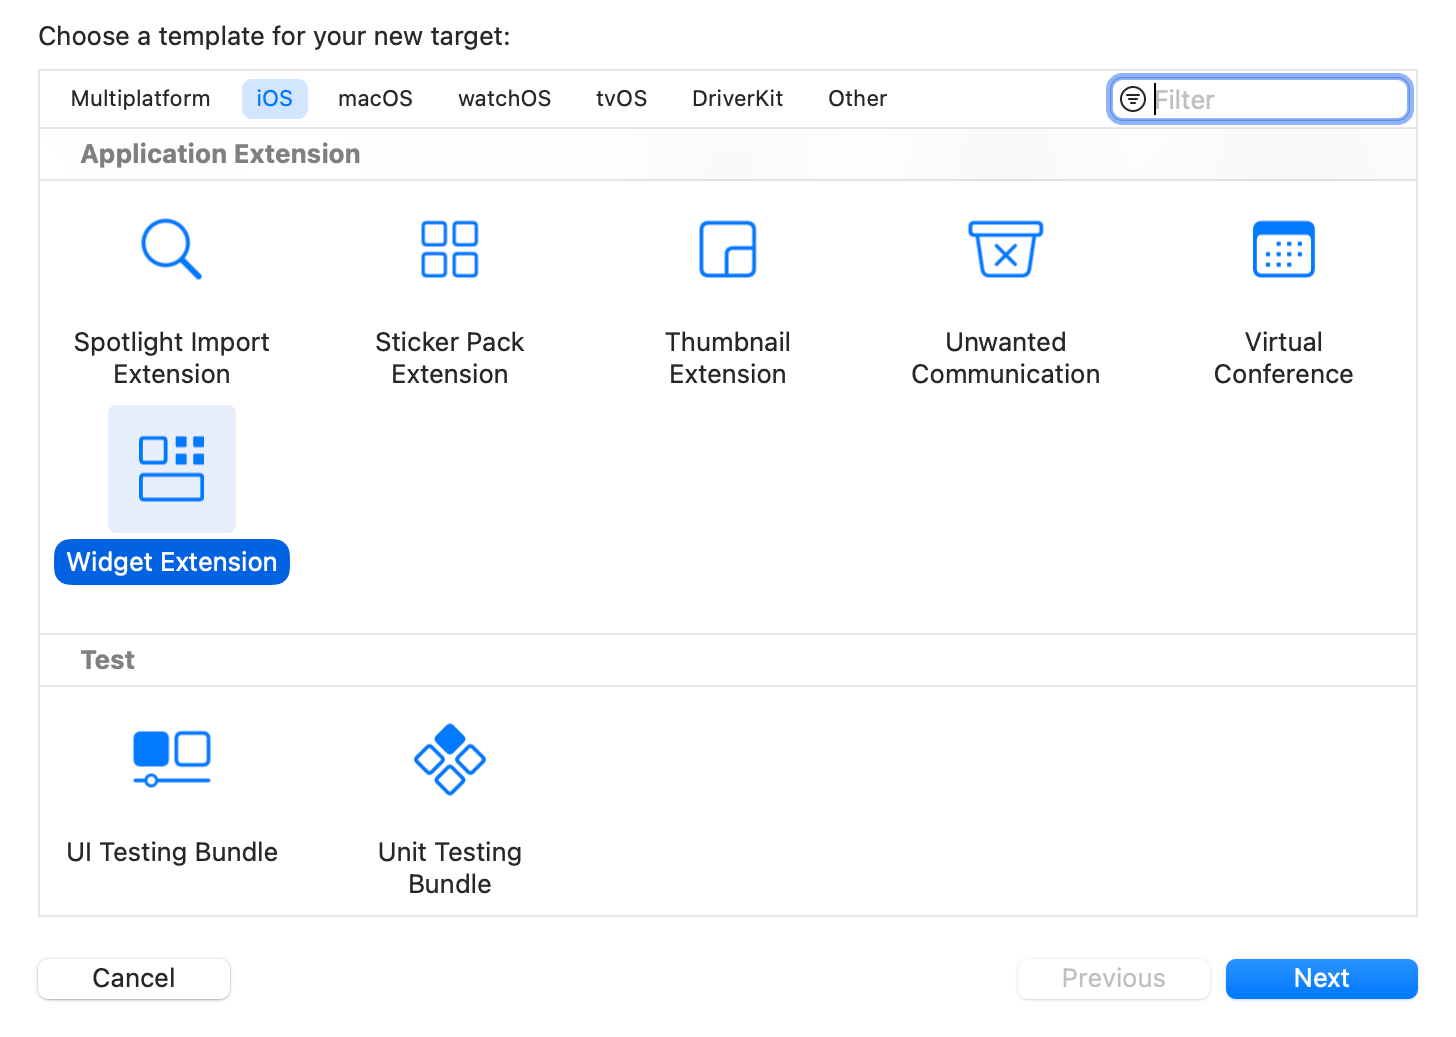
Go to Target, and leave the code:
@main
struct LiveActivityWidget: Widget {

    let kind: String = "LiveActivityWidget"

    var body: some WidgetConfiguration {
        StaticConfiguration(kind: kind, provider: Provider()) { entry in
            widgetEntryView(entry: entry)
        }
        .configurationDisplayName("My Widget")
        .description("This is an example widget.")
    }
}In Info.plist, add the attribute Supports Live Activities:
<key>NSSupportsLiveActivities</key>
<true/>
StaticConfiguration is used for widgets and complications. We will replace it with another one soon, but first we will define the data model.
Data model
Live Activity is created in the application itself, and the model will be used in both the application and the widget. So it's a good idea to make one class and poke around between the targetets. Create a new file for the model, inherit from ActivityAttributes:
import ActivityKit

struct ActivityAttribute: ActivityAttributes {

    public struct ContentState: Codable, Hashable {

        // Dynamic data

        var dynamicStringValue: String
        var dynamicIntValue: Int
        var dynamicBoolValue: Bool
    }

    // Static data

    var staticStringValue: String
    var staticIntValue: Int
    var staticBoolValue: Bool
}
Define dynamic data in the ContentState structure - it will change and update the UI. Outside ContentState - static data, it is available only when creating Live Activity.
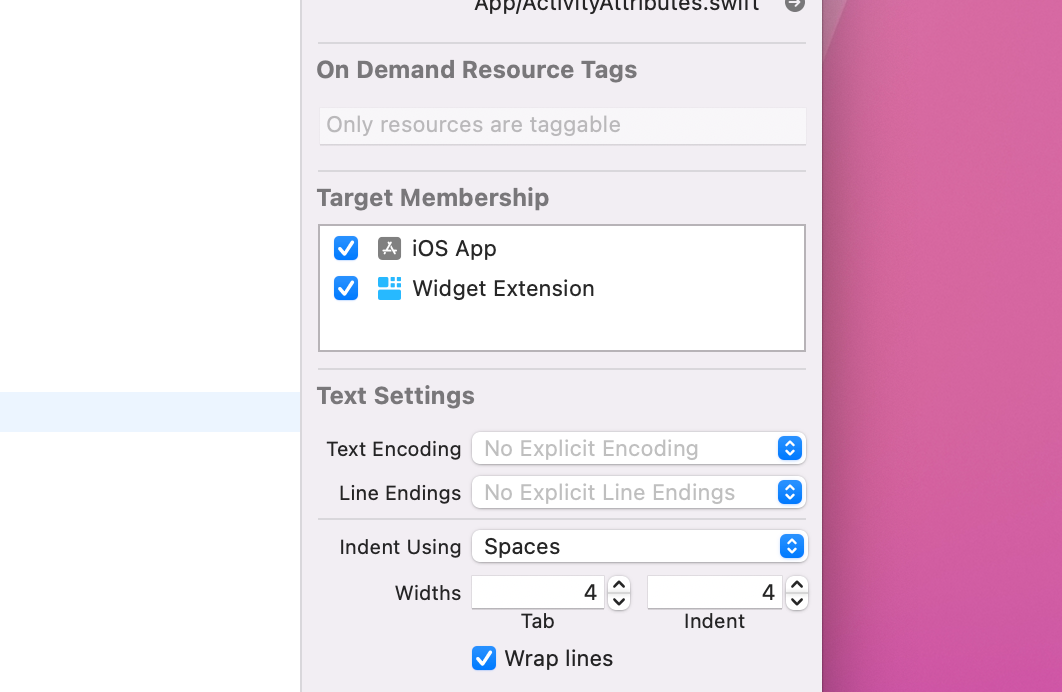
Share the file between the two targets by selecting the application's main target and widget target in the inspector on the right:
UI
In the LiveActivityWidget object, change the configuration to ActivityConfiguration:
struct LiveActivityWidget: Widget {

    let kind: String = "LiveActivityWidget"

    var body: some WidgetConfiguration {
        ActivityConfiguration(for: ActivityAttribute.self) { context in
            // Here is the UI for activity on the locked screen
        } dynamicIsland: { context in
            // Here is the UI for Dynamic Island
        }
    }
}
Two closures, the first for the UI on the locked screen, the second for the dynamic island. Note, we specify attribute class ActivityAttribute.self - this is the data model we defined above.
Lock Screen
This view is shown on the locked screen. All widget tools are available in Live Activity. Specify a property context to pass the data model:
struct LockScreenLiveActivityView: View {

    let context: ActivityViewContext<ActivityAttribute>

    var body: some View {
        VStack {
            Text("Dyanmic String: \(context.state.dynamicStringValue))")
            Text("Static String: \(context.staticStringValue))")
        }
        .activitySystemActionForegroundColor(.indigo)
        .activityBackgroundTint(.cyan)
    }
}In the example I printed both dynamic and static properties from ActivityAttribute. Let's specify the view in the widget:
struct LiveActivityWidget: Widget {

    let kind: String = "LiveActivityWidget"

    var body: some WidgetConfiguration {
        ActivityConfiguration(for: ActivityAttribute.self) { context in
            LockScreenLiveActivityView(context: context)
        } dynamicIsland: { context in
            // Here is the UI for Dynamic Island
        }
    }
}
Dynamic Island
The dynamic island has three kinds: compact, minimal and expanded.
Compact & Minimal
If one activity is running - then the content can be placed to the left and right of the dynamic island.

If more than one Live Activity is running, the system will select two of them. One will show on the left, attached to the island, and the other on the right, separated from the island in a circle.

The code for each display option:
DynamicIsland {
    // Here is the code for the expanded view.
    // We'll analyze it in the next paragraph.
} compactLeading: {
    Text("Leading")
} compactTrailing: {
    Text("Trailing")
} minimal: {
    Text("Min")
}
Expanded
The expanded Live Activity is shown when a person clicks and holds the compact or minimal view. When Live Activity is updated, the expanded view appears automatically for a couple of seconds.
The code for the expanded view. Each closure defines an area on the Live Activity.
DynamicIslandExpandedRegion(.center) {}
DynamicIslandExpandedRegion(.leading) {}
DynamicIslandExpandedRegion(.trailing) {}
DynamicIslandExpandedRegion(.bottom) {}
Area markup:
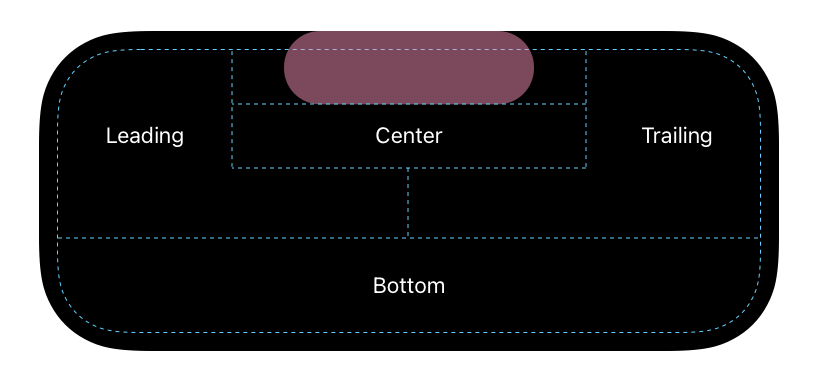
- center content below the camera.
- leading space from the left corner to the camera. If you use the vertical stack, the space below will be available.
- trailing similar to leading but for the right edge.
- bottom content below all other areas.
If the content does not fit in the left and right areas, you can merge it with the Bottom area. The area will be adaptive, the screenshot shows the maximum size:
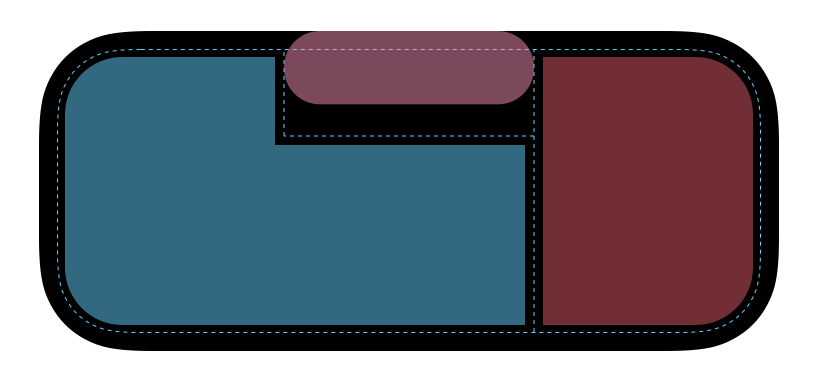
To allow an area to use the space below, specify verticalPlacement:
DynamicIslandExpandedRegion(.leading) {
    Text("Leading Text with merge region")
        .dynamicIsland(verticalPlacement: .belowIfTooWide)
}Add a new Live Activity
Live Activity can only be created within an app. You can update and end a Live Activity both within the app and via push notification.
First, check the availability of Live Activities - the user may have banned them or the system has reached the limit. To check, use the code:
guard ActivityAuthorizationInfo().areActivitiesEnabled else {
    print("Activities are not enabled")
    return
}
You can track the status:
for await enabled in ActivityAuthorizationInfo().activityEnablementUpdates {
    // Here is your code
}
To create a new Live Activity, create attributes and then call request:
let attributes = ActivityAttribute(...)
let contentState = ActivityAttribute.ContentState(...)
do {
    let activity = try Activity<ActivityAttribute>.request(
        attributes: attributes,
        contentState: contentState
    )
} catch {
    print("LiveActivityManager: Error in LiveActivityManager: \(error.localizedDescription)")
}
Note, here the static and updatable properties are separated into two objects.
List of current Live Activities
To get the Live Activity created, you must specify an attribute model:
for activity in Activity<ActivityAttribute>.activities {
    print("Activity details: \(activity.contentState)")
}
Update and end Live Activity
The Live Activity can only be updated and terminated with dynamic parameters - Content State.
Inside the app
To update Live Activity from within the app:
// New data
let contentState = ActivityAttribute.ContentState(...)

Task {
    await activity?.update(using: contentState)
}
To terminate a Live Activity, call:
await activity?.end(dismissalPolicy: .immediate)The Live Activity will close immediately. To keep the Live Activity on the screen for a while longer:
await activity?.end(using: attributes, dismissalPolicy: .default)The Live Activity will be updated with the final data and will be on the screen for some more time. The system will close the activity when the user sees the new data or at most 4 hours later, whichever comes first.
Live Activity does not have a timeline like widgets. To update or close Live Activity when the application is in the background, you need to use Background Tasks.
Through Push Notifications
When we create a Live Activity, we get a pushToken. It is used to update the Live Activity via push notifications.
Let's form a push to update a Live Activity. Headers:
apns-topic: {Your App Bundle ID}.push-type.liveactivity
apns-push-type: {liveactivity
authorization: bearer {Auth Token}
Body:
"aps": {
    "timestamp": 1168364460,
    "event": "update", // or end
    "content-state": {
        "dynamicStringValue": "New String Value"
        "dynamicIntValue": 5
        "dynamicBoolValue": true
    },
    "alert": {
        "title": "Title of classic Push",
        "body": "Body or classic push",
    }
}
The content-state dictionary must match the attribute model ActivityAttribute.ContentState. We can only update dynamic properties. Properties not in ContentState cannot be updated.
Trace Press
Clicking on Live Activity is good to open the relay screen, for this you need to implement Deep Link. Set the modifier widgetURL(_:). You can set a different link for each area:
DynamicIslandExpandedRegion(.leading) {
    Text("Leading Text with merge region")
        .widgetURL(URL(string: "example://action"))
}
The expanded view of Dynamic Island supports Link.
